Logic Pro for iPad has nine stock MIDI FX effects available.
In this feature I cover three of these effects that I find most useful.
MIDI FX
You only have the option to add MIDI FX to MIDI and Session Player tracks.
MIDI effects process or generate MIDI data in real time in various different ways and You access them via the plugins menu – tap the plus to open a list of MIDI FX.
Logic Pro for iPad has 9 stock MIDI FX available:
- Arpeggiator
- Chord Trigger
- Modifier
- Modulator
- Note Repeater
- Randomizer
- Scripter
- Transposer and
- Velocity Processor
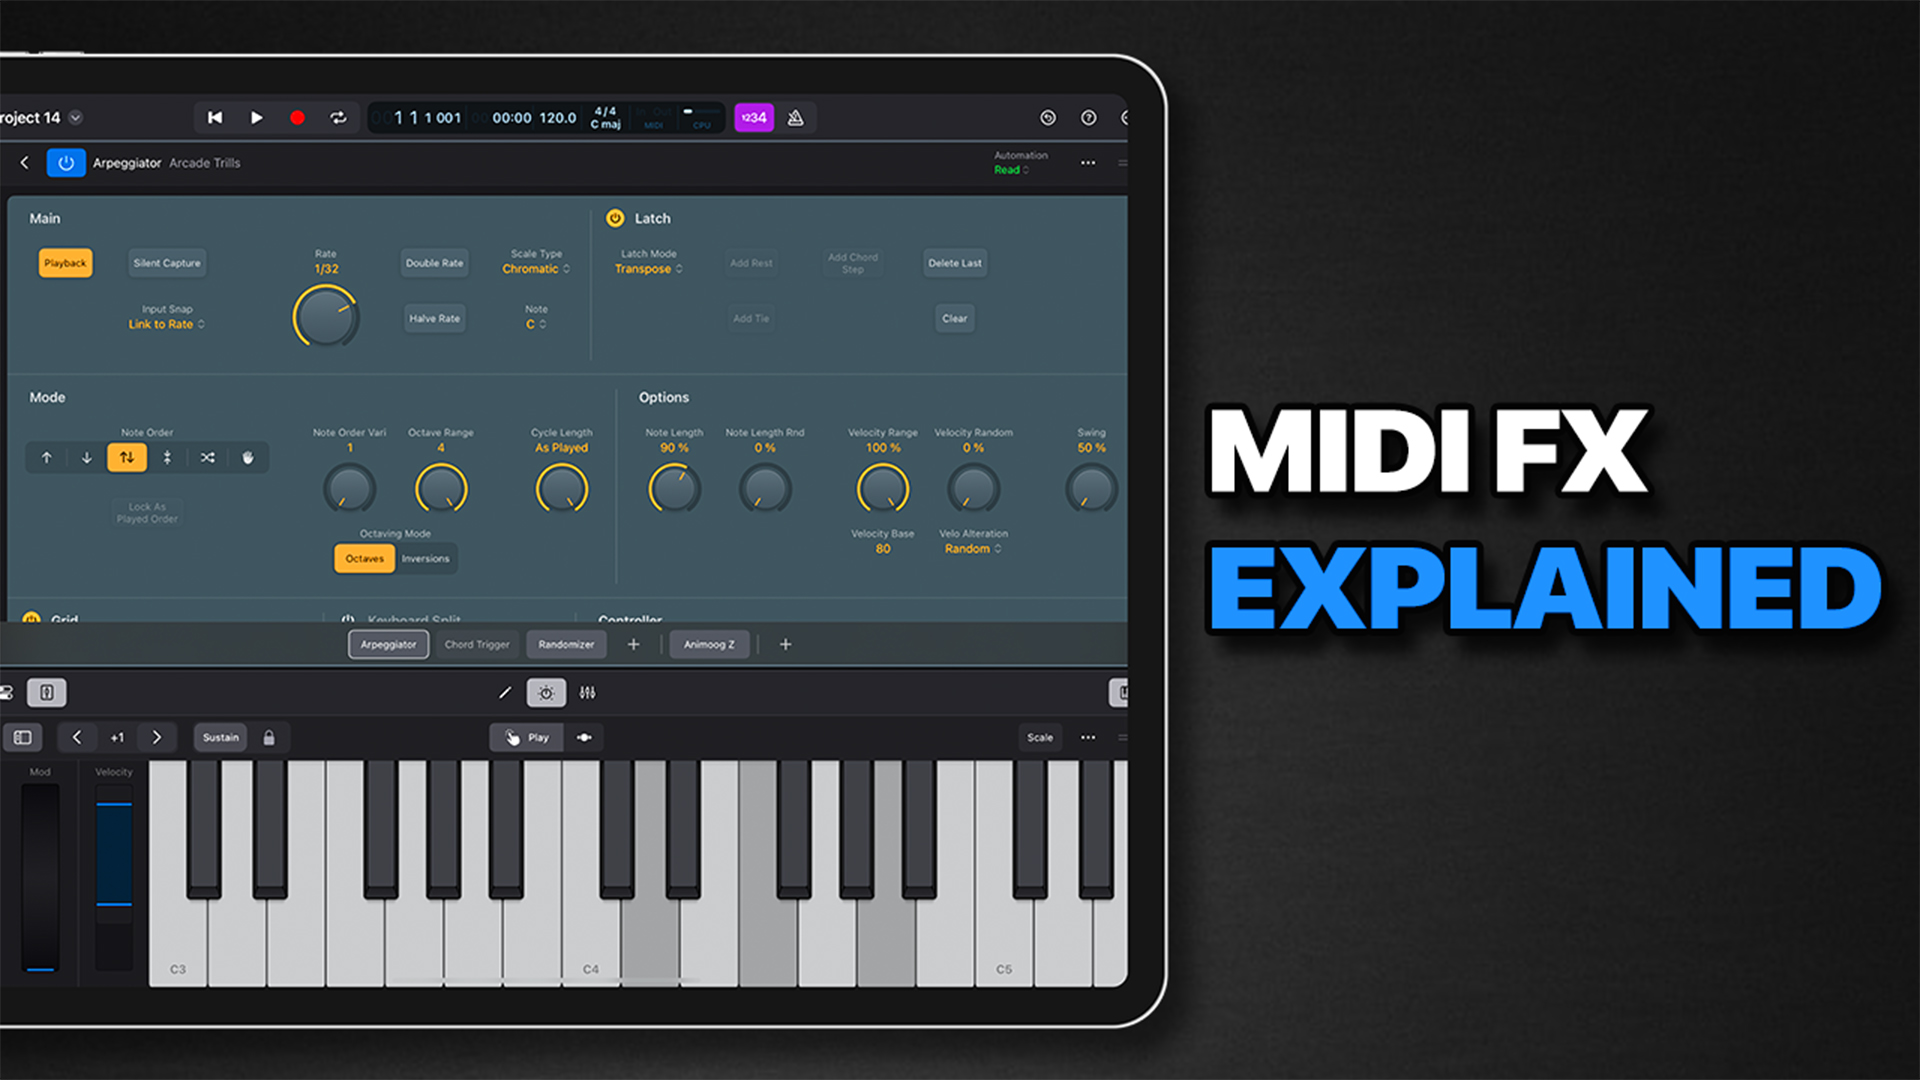
Arpeggiator
The arpeggiator is one you’re likely most familiar with. In a nutshell it generates pre-defined patterns based on incoming MIDI notes.
In the Main section, you can adjust the rate that arpeggiated notes patterns will play with the rate knob and double and halve rate buttons.
The playback button starts or stops arpeggiated playback of notes you hit and the silent capture button allows you to capture a note sequence and then hit playback to have the sequence play back automatically. The arpeggiator this by turning Latch Mode on, which plays back your sequence without you having to play the notes.
In the latch section you can select between 6 latch modes:
- Reset – unsurprisingly resets the current latched notes when you play a note
- Transpose – transpose the arpeggio relative to the note value of the pressed key
- Gated Transpose – works the same as transpose except the arpeggio only plays while a key is pressed
- Add – allows you to Play keys (one by one, or simultaneously as a chord) to add them to the latched arpeggio.
- Add temporarily – works the same as Add, except except that played notes are added to the latched arpeggio only while held.
- Through – All incoming MIDI notes are passed through the Arpeggiator, enabling you to play along with a latched arpeggio.
The mode section lets you choose from 6 different directions that arpeggiated notes will play back in – Up, Down, up and down, outside in, random and as played – where the notes will trigger as you played them.
You can also adjust note order variance, octave range and whether your arpeggio plays back in straight octaves or chord inversions.
The cycle length knob lets you set the length for the arpeggio.
In the options section you can change things like the note length, velocity randomization and Swing value.
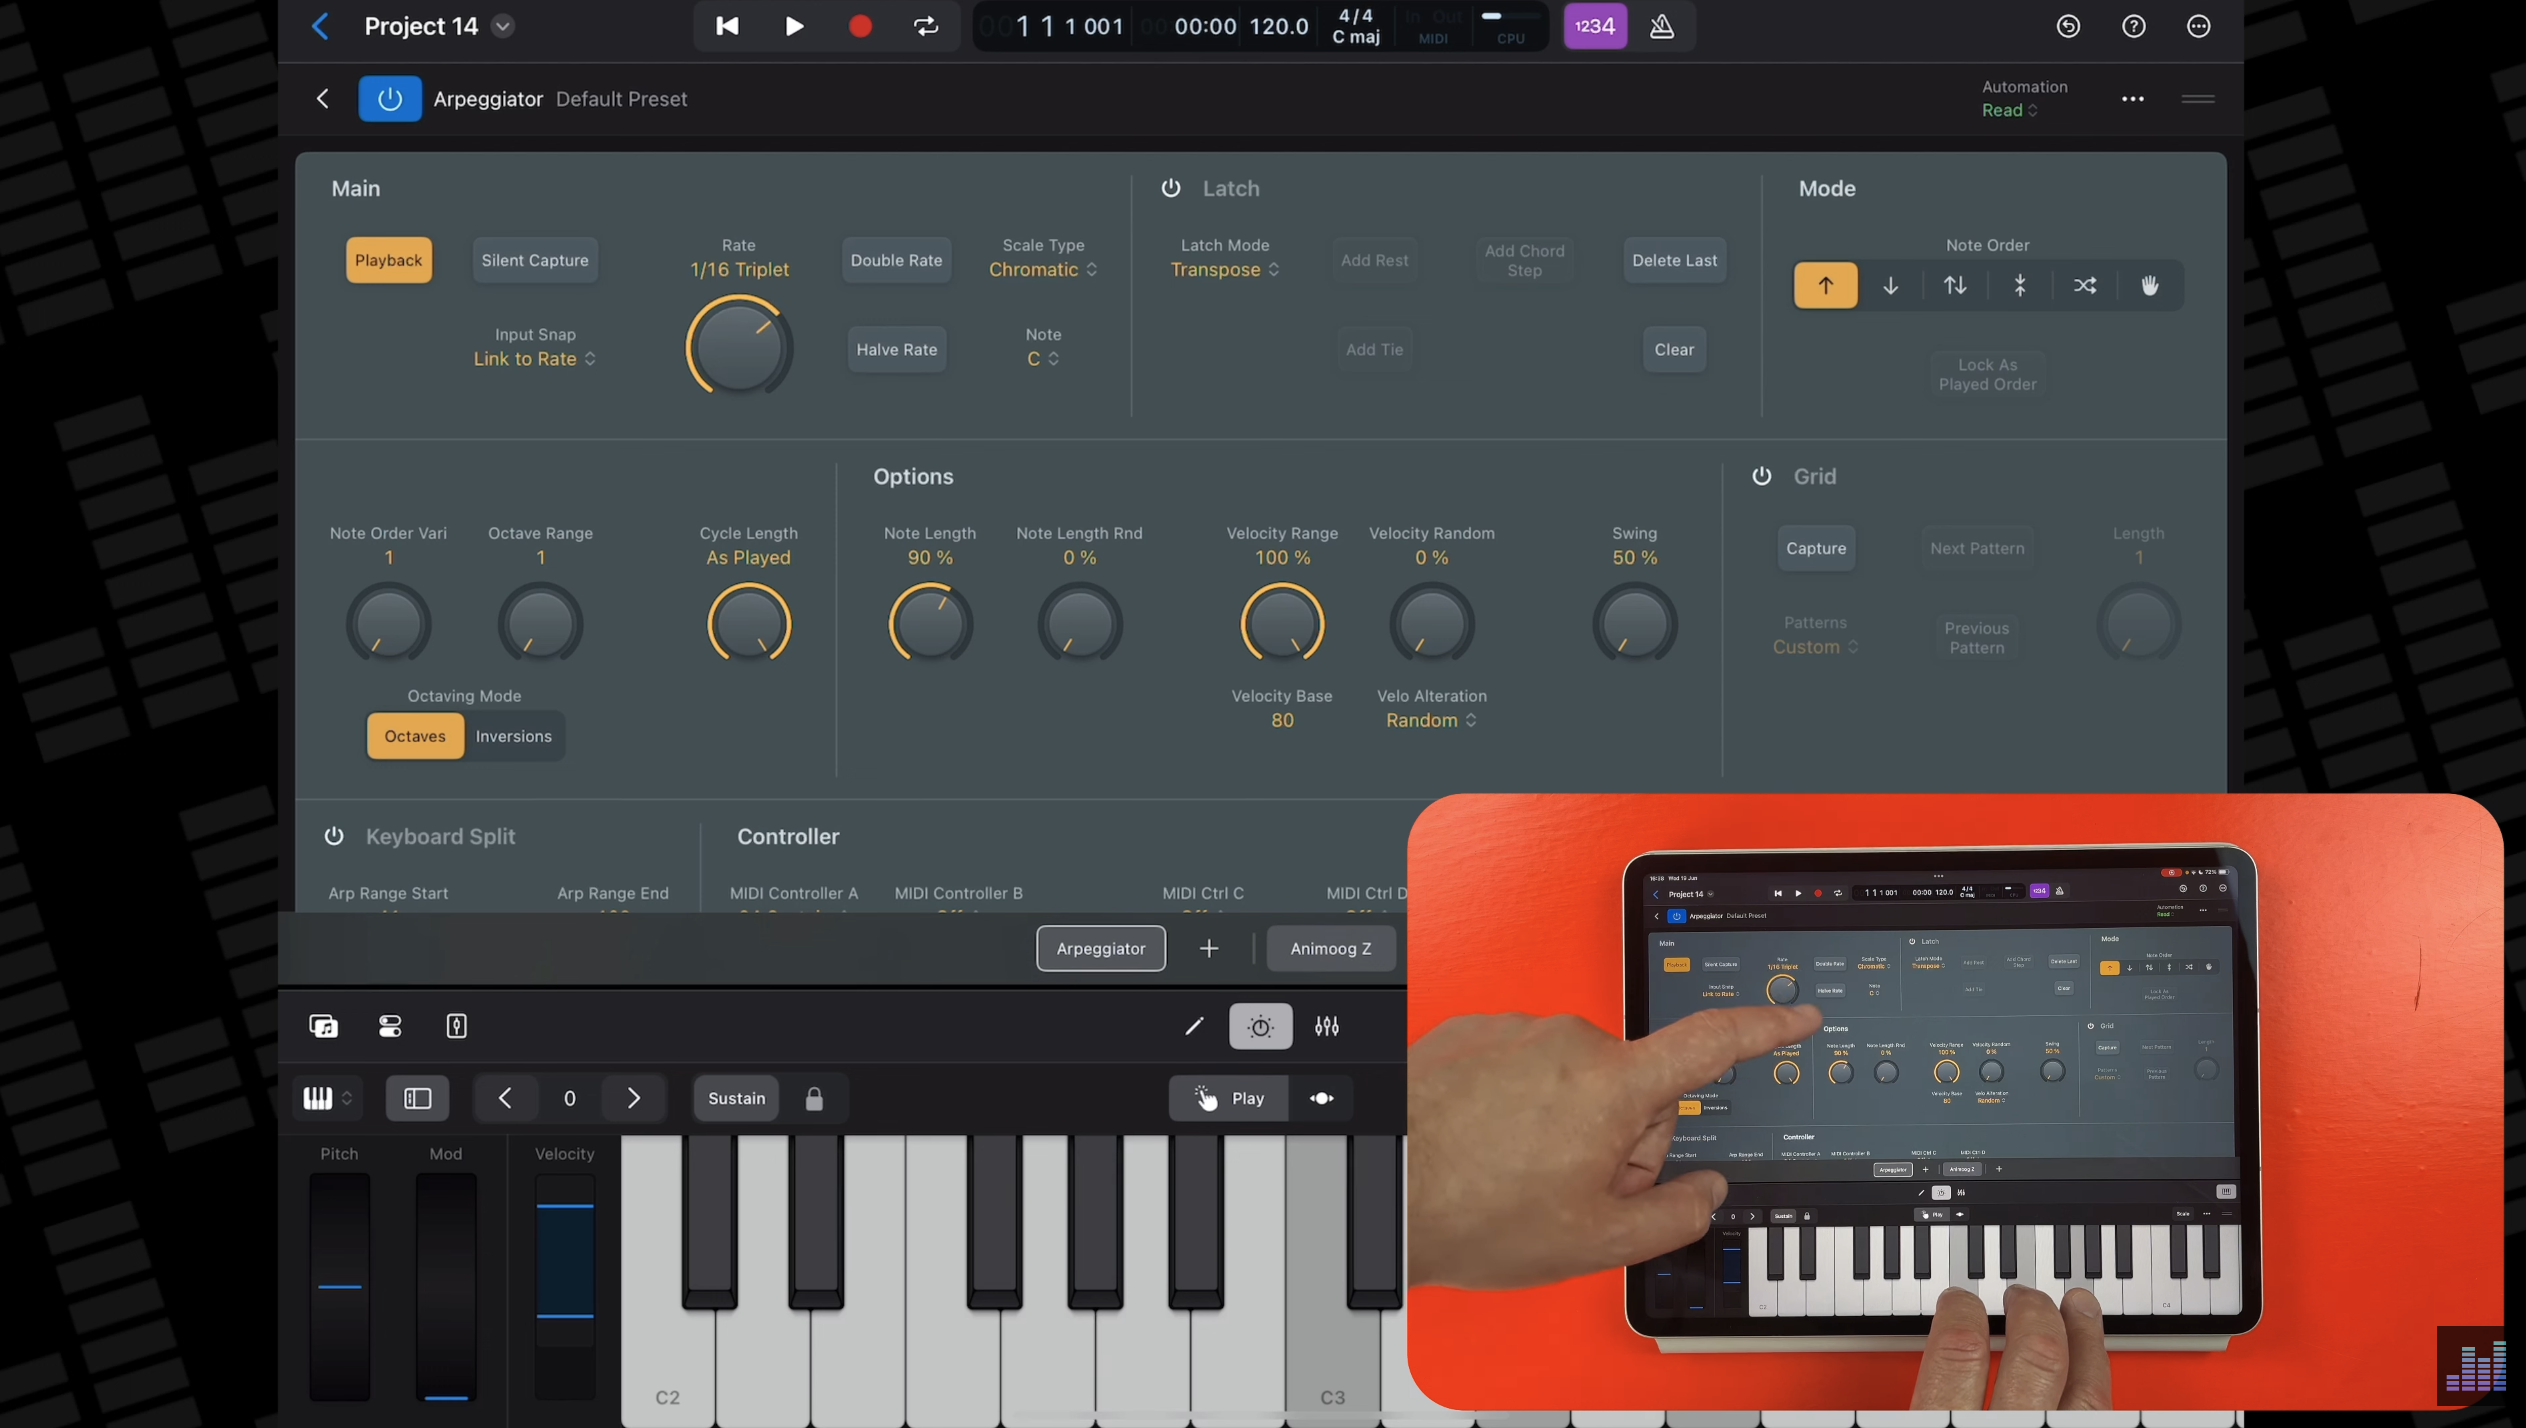
Turning Grid on overrides the other settings in the arpeggiator and instead outputs your arpeggio based on a 16 step grid. This is a fantastic feature in Logic Pro for Mac as you have an easy to use Grid UI.
We don’t have that UI in Logic Pro for iPad, which leaves you kind of unable to use the Grid mode properly unfortunately. Still you can select from some pre made Grid patterns if you want to have a play with those.
The Arpeggiator Keyboard Split parameters let you divide your keyboard into 3 zones:
- Notes below the Arp Range Start slider value can be used as remote control keys for Arpeggiator functions. or just played as regular notes
- Notes between the Arp Range Start and End slider values can be arpeggiated.
- Notes above the Arp Range End slider value can be played without arpeggiation.
Chord Trigger
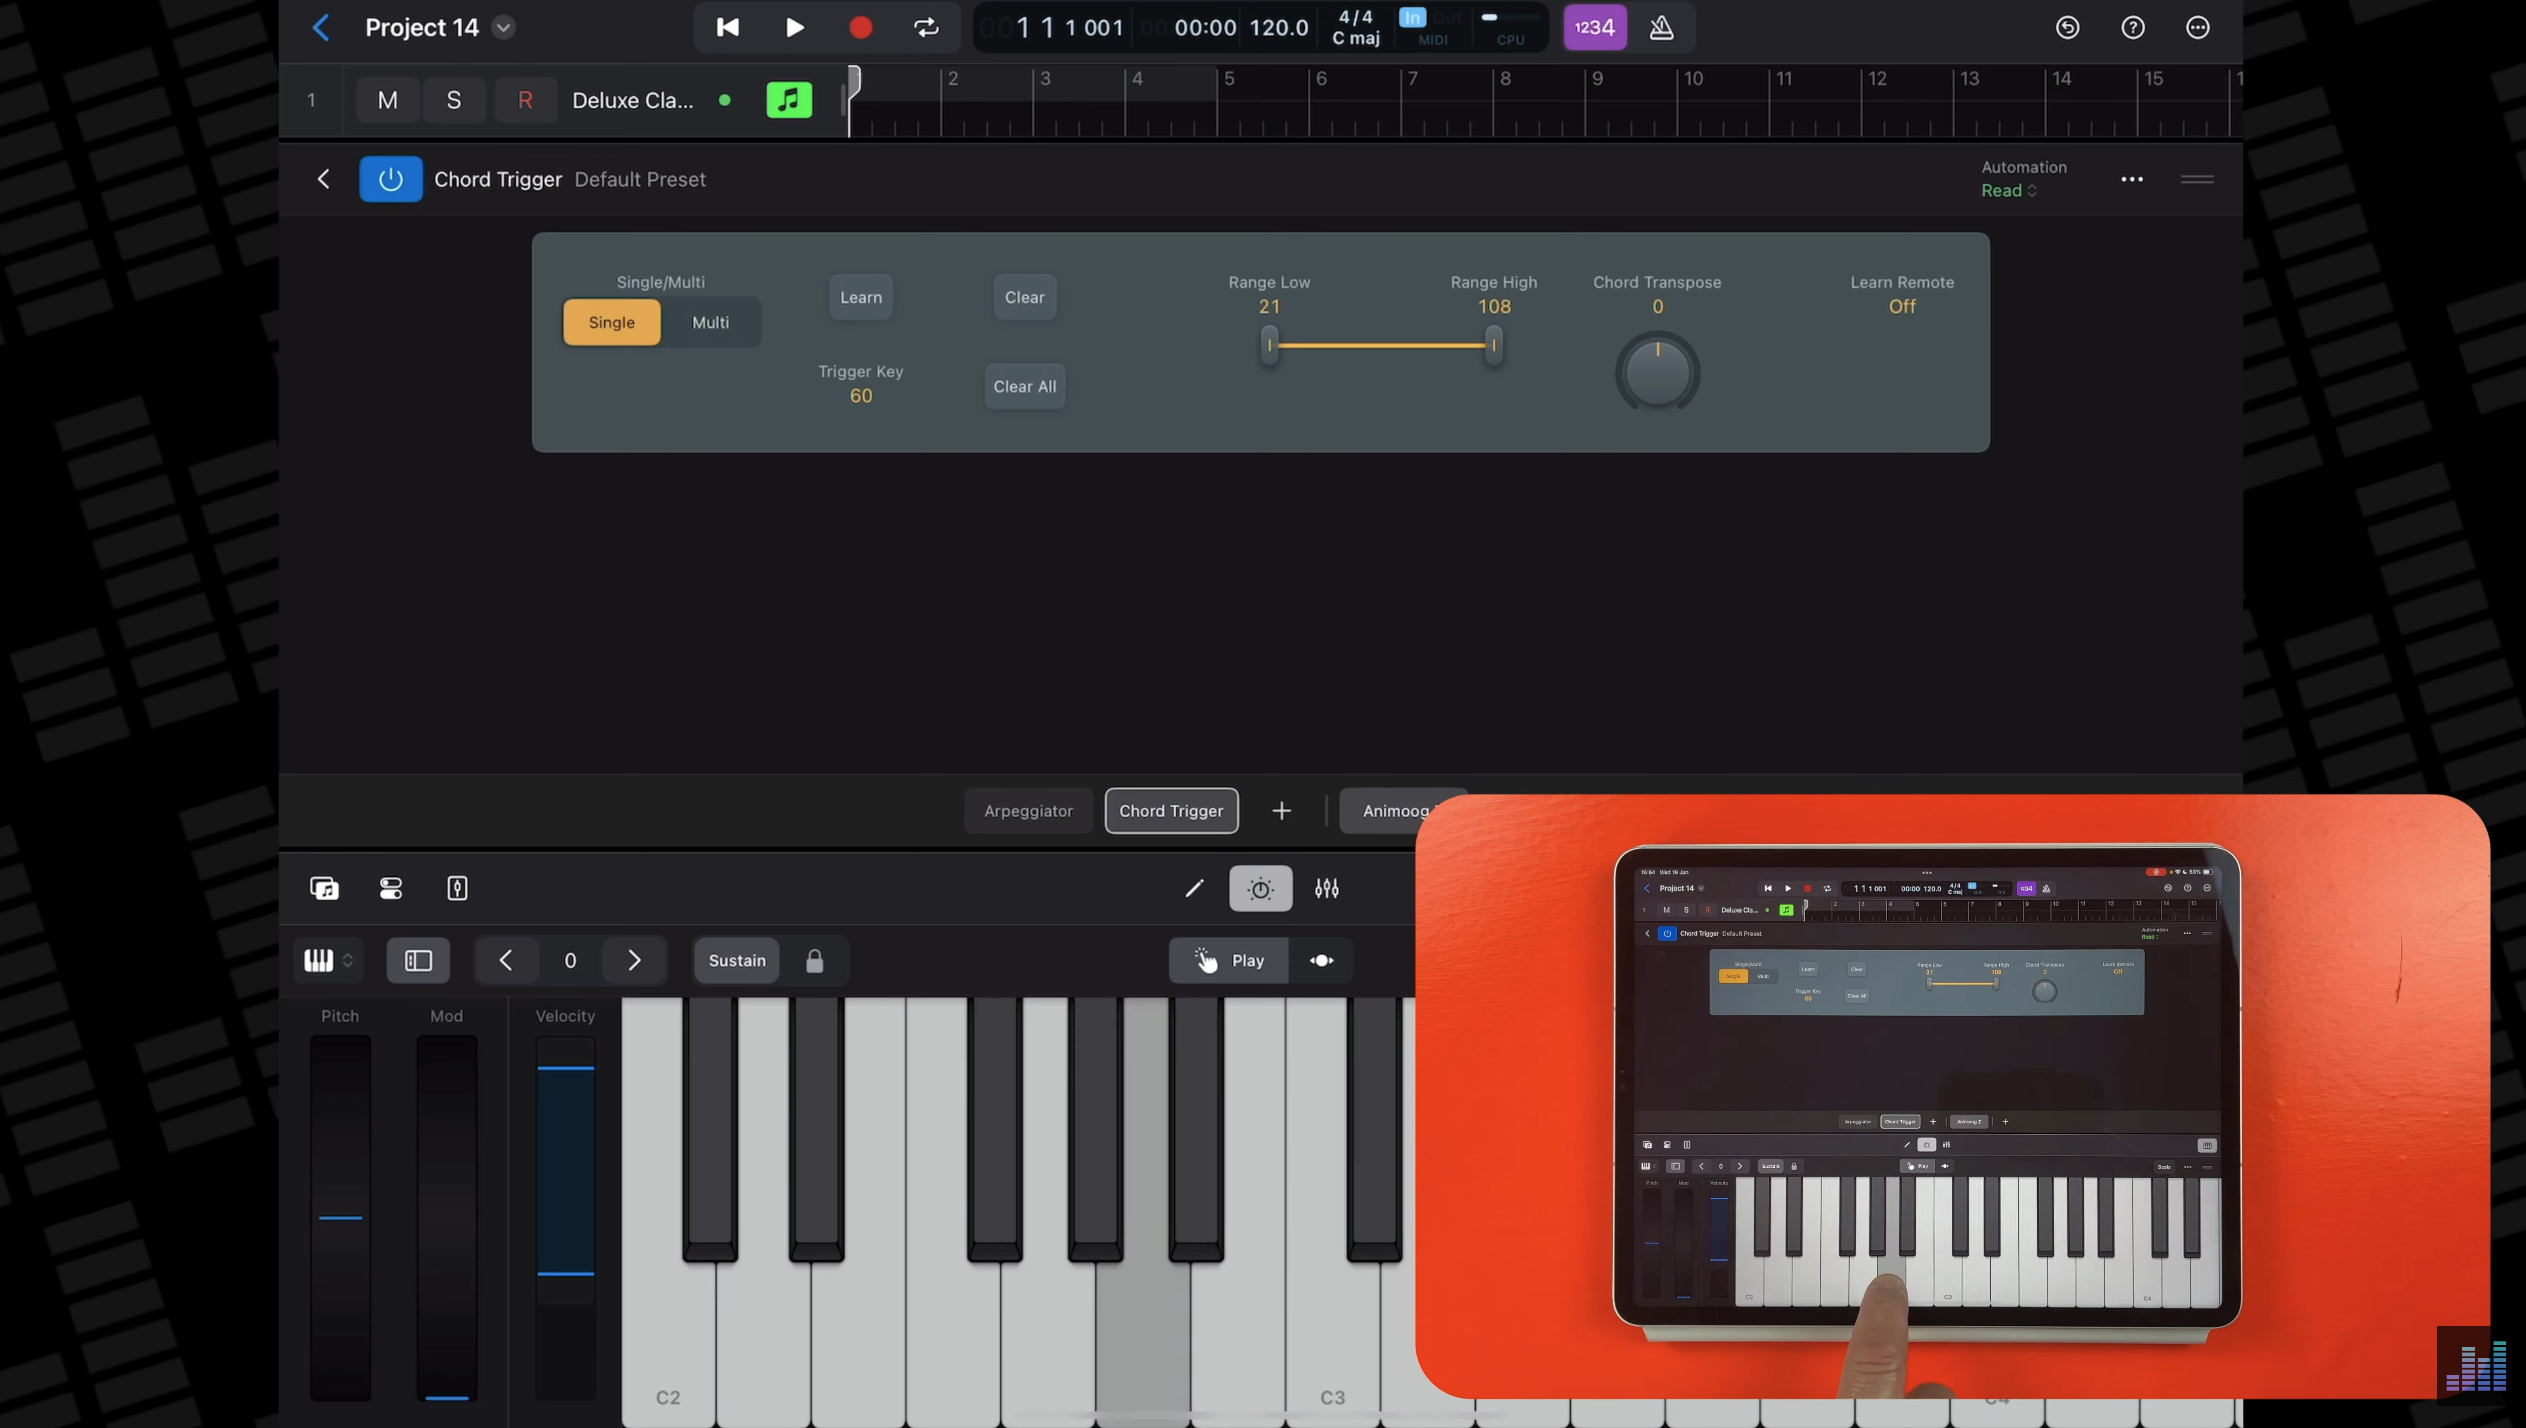
The Chord Trigger MIDI FX lets you trigger chords by playing a single MIDI key.
It’s really simple, but very useful.
First off, to assign a chord to a key, tap on learn, then play the chord you want, then lap the learn button again.
In single chord mode the chord shape you made will be repeated regardless of what key you hit.
In Multi chord mode, you can assign different chord shapes to specific keys on the keyboard.
Using the trigger range sliders, you can set which keys on your keyboard actually trigger a chord and which trigger a regular note.
And you can transpose chords by semitones or by up to four octaves with the transpose control.
Randomizer

The randomizer plugin, well randomizes different things you select in real time.
In the event type menu you can choose what the randomizer will randomize. You can randomize things like velocity, notes and pitchbend.
You can adjust the range of values that are affected with the range slider and adjust the probability of randomization with the probability knob.
The random amount knob sets the intensity of randomization and the seed slider specifies are starting point.
Using the weight control you can specify whether low range or high range values will be more likely randomized, or a mix of ranges.
I usually use this plugin to randomize velocity as it can make some keyboard, synth and piano loops and patterns sound a bit more dynamic without having to dive into the editor and change note velocities manually.