
If you’re looking to hook up an audio interface to Logic Pro on your iPad, the good news is it’s easier than ever. Whether you’re recording vocals, guitars, or just want better audio in and out of your projects, this guide will walk you through exactly how to get everything set up.
For this walkthrough, I’m using the Audient iD4, but the same steps apply to pretty much any class-compliant USB audio interface. Just be aware that FireWire interfaces won’t work with iPads, even if you try using an adapter.
Also, this article focuses on USB-C iPads (like the M1, M4, or A17 models). While Logic Pro still technically supports some Lightning-based iPads, I really wouldn’t recommend using them. Find out more about why here.
Getting Started: USB-C Makes It Easy
If your iPad has a USB-C port, setting up an audio interface is genuinely straightforward. Some interfaces, like the Audient iD4, come with a USB-C to USB-C cable in the box. Just plug it into your iPad, and you’re up and running.
If you don’t already own an interface and are looking for something well-suited to iPad recording, the iD4 is a solid choice. It offers excellent build quality, solid performance, and doesn’t break the bank.
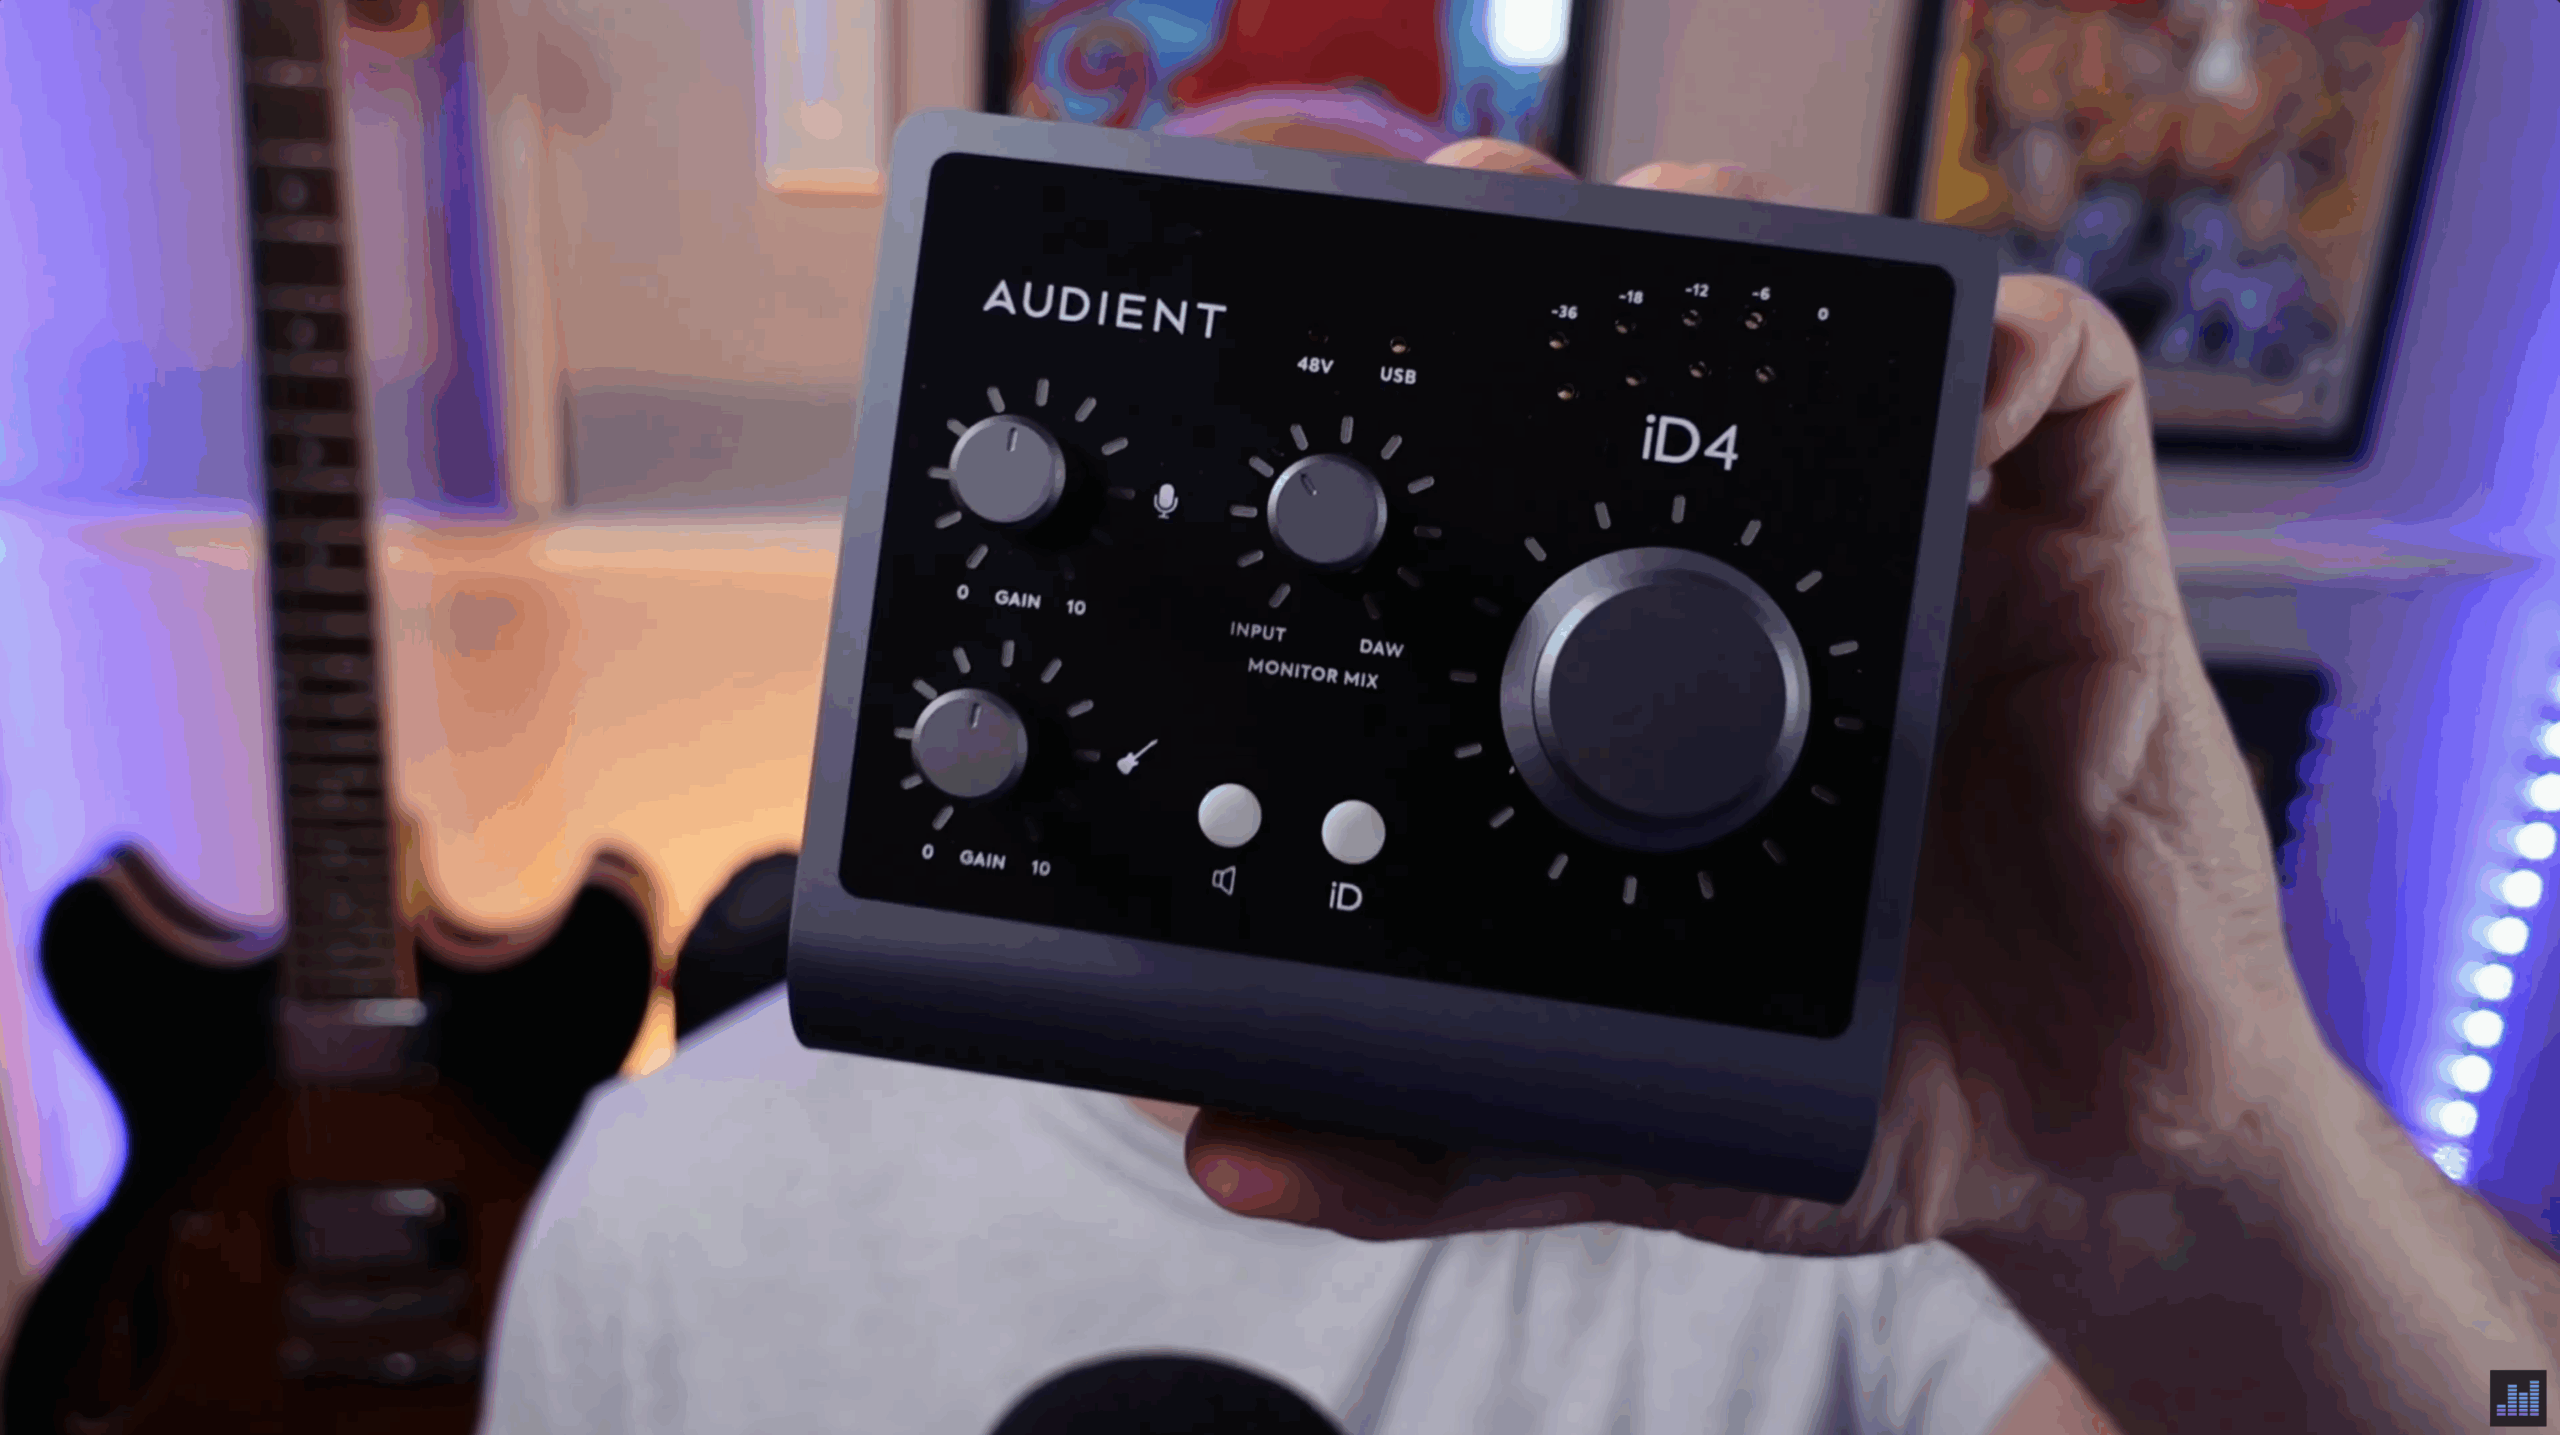
Why the Audient iD4?
- Uses the same mic preamp found in Audient’s large-format consoles
- Pristine AD/DA conversion with low latency
- Robust metal chassis that’s surprisingly portable
- Proper 32-bit conversion that delivers pro-level sound
It’s small enough to throw in a bag next to your iPad and take anywhere, which makes it a great mobile recording companion.
Grab an Audient ID4 audio interface here
What About Charging While Recording?
If your interface only includes a USB-C to USB-A cable (as many still do), or you want to charge your iPad while using the interface, you’ll need an adapter or hub. Thankfully, unlike Lightning-based iPads, USB-C iPads give you more flexibility here and you don’t have to use Apple’s overpriced dongles.
I personally use the Anker 6-in-1 USB-C hub, which attaches neatly to the side of the iPad and gives you additional ports, a headphone jack, and pass-through charging. It works flawlessly and has become part of my everyday setup.
And yes, USB-C iPads provide enough power to run most class-compliant interfaces without any external power required.
Adjusting Logic Pro’s Audio Settings on iPad
Once your interface is connected, launch Logic Pro and open a new project. From there, create an audio track and tap the three dots in the top-right corner to access the Settings menu.
In the Audio tab, you’ll see Autoselect Audio Devices toggled on by default. This means Logic will automatically choose the connected interface as both the input and output device.

What does that mean for you?
- Input: Audio will be captured through the interface (e.g. mic or instrument)
- Output: Playback audio will also be routed through the interface
So, if you plug your headphones into the iPad’s port (or a dongle), you won’t hear any output from Logic. You’ll need to connect your headphones or speakers directly to the audio interface.
You can toggle Autoselect Audio Devices off if you want to manually choose input and output sources. This gives you more flexibility for example, recording with your interface but listening back through the iPad’s built-in speakers or vice versa.
iPadOS 26 Adds a Handy New Audio Feature
One new feature in iPadOS 26 is a Logic Pro-specific microphone selector, accessible from Control Center. Swipe down from the top-right of your screen while Logic is open and you’ll see a new mic control panel.
Here you can:
- Enable global Noise Cancellation for cleaner recordings
- Select which microphone Logic uses at the system level
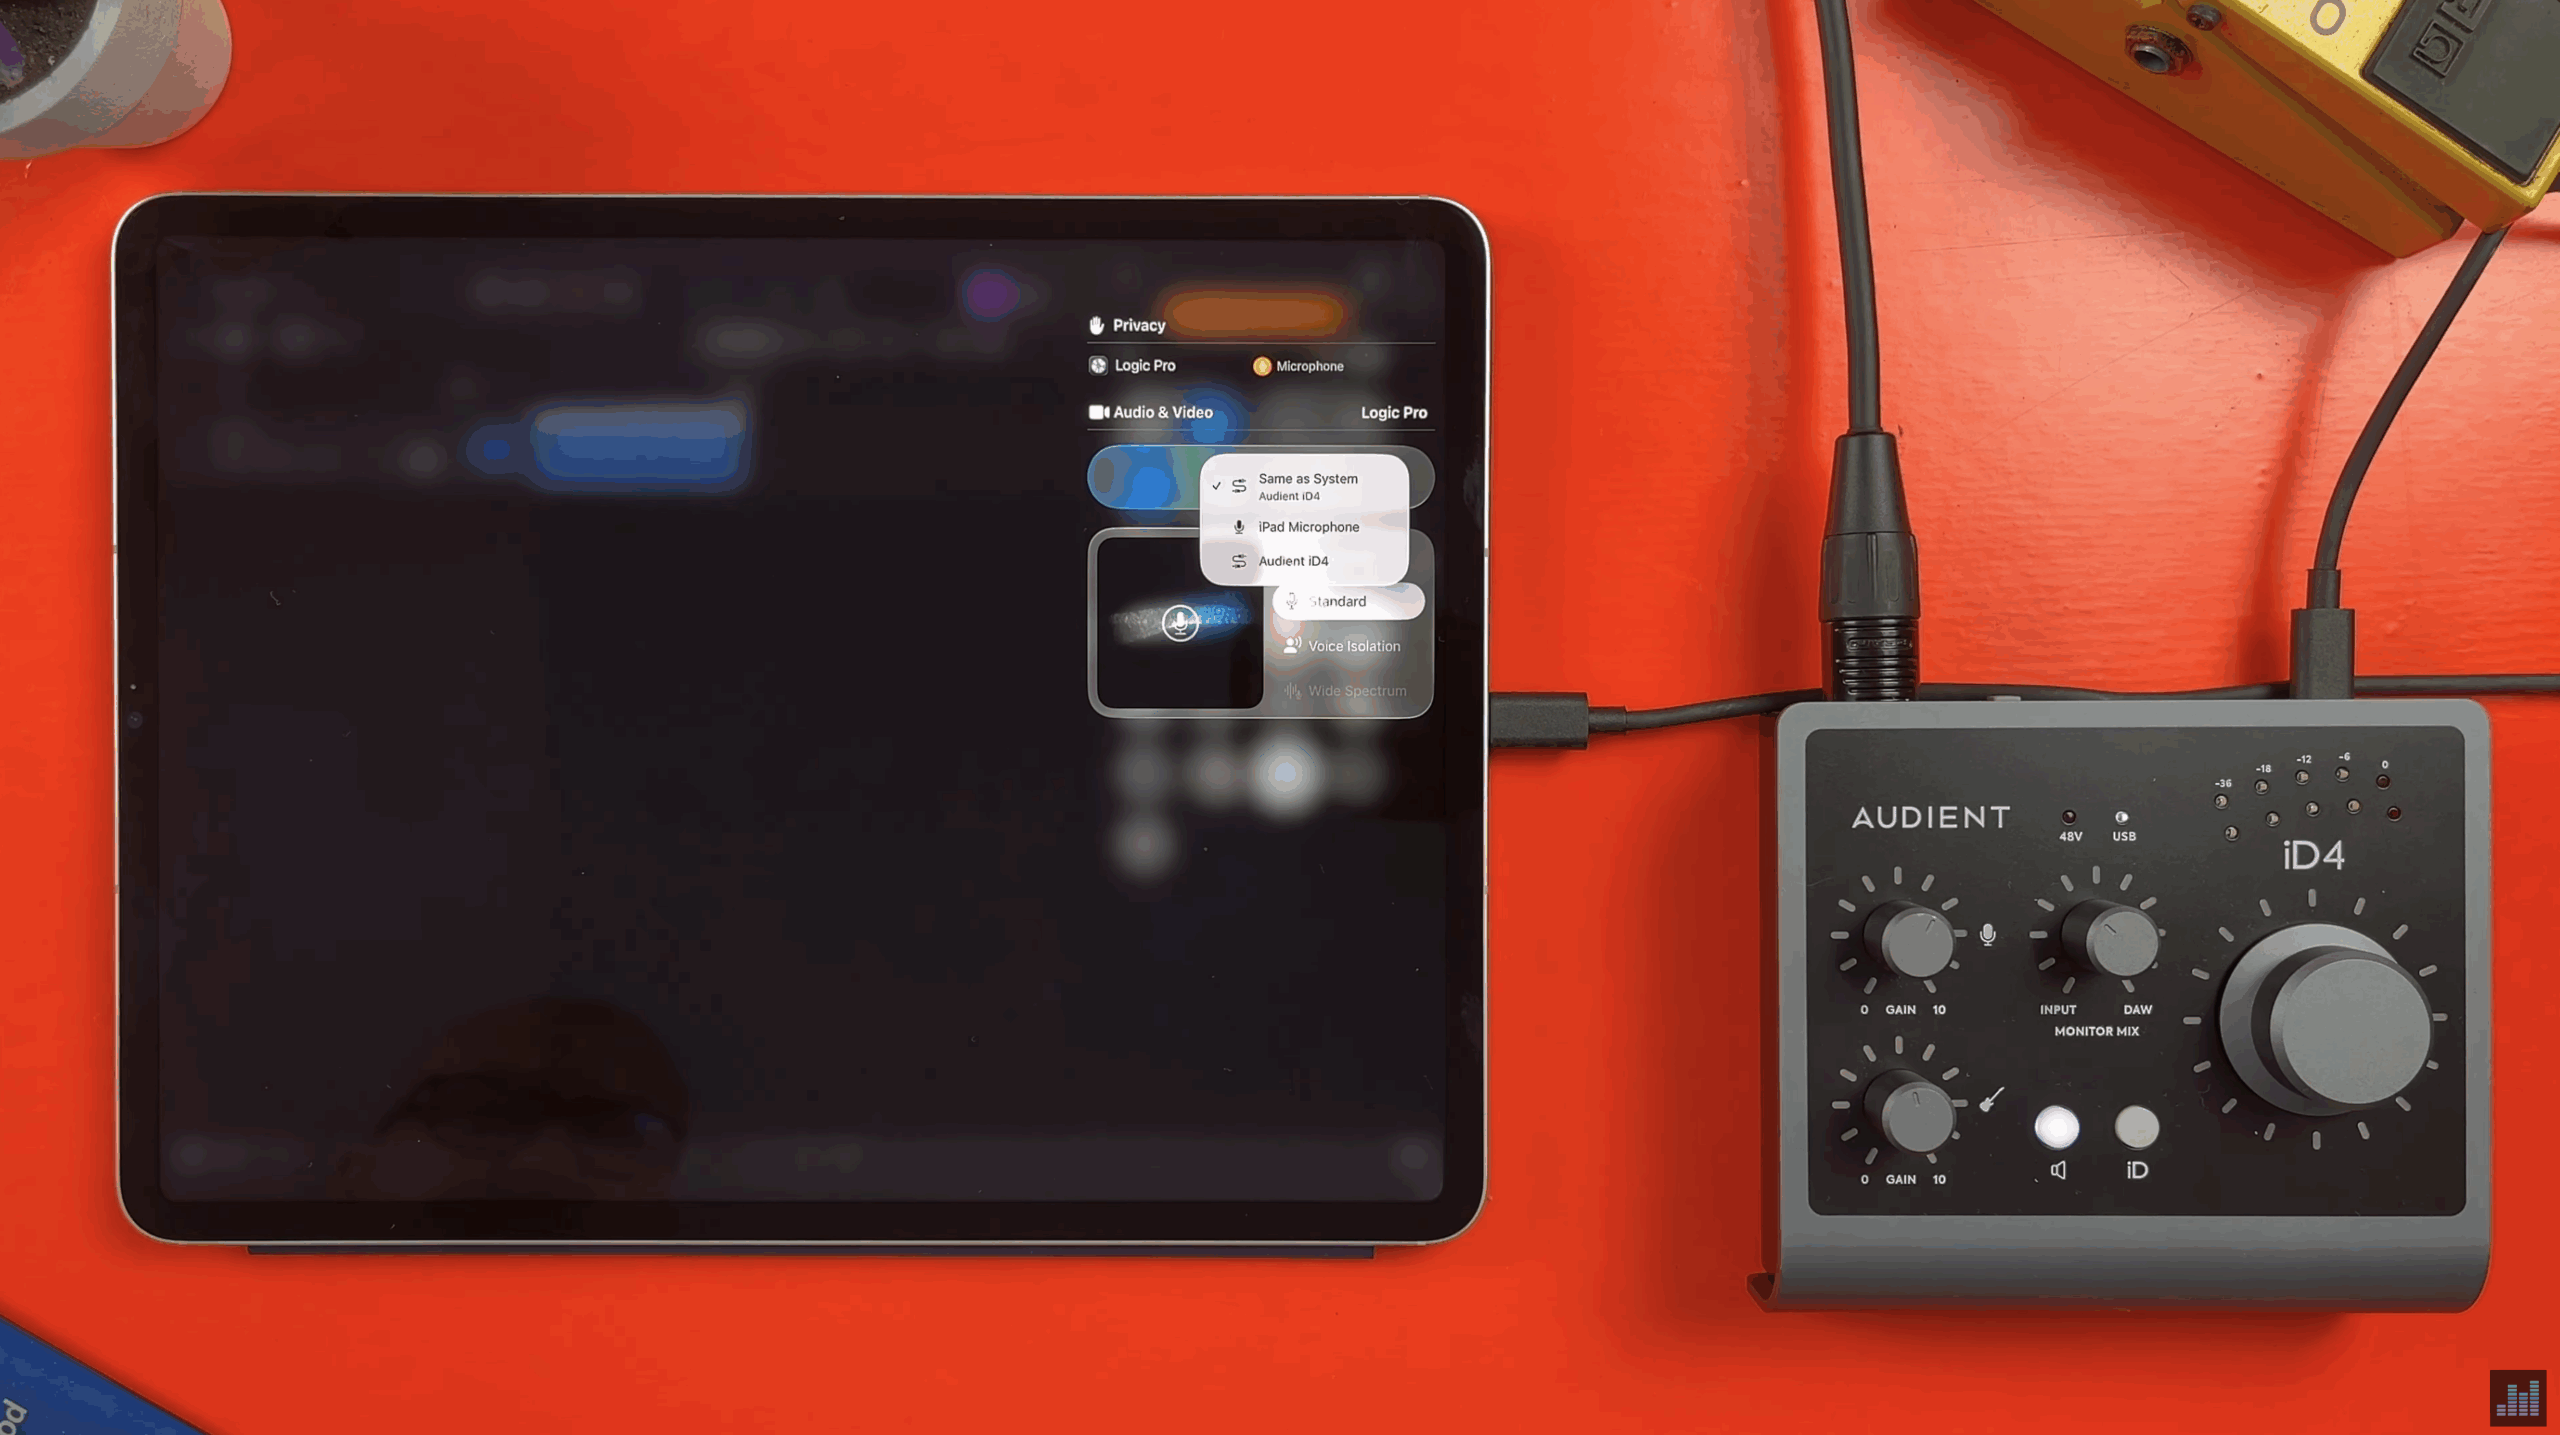
This system-level control actually overrides Logic’s internal settings, so it’s worth checking if things aren’t behaving as expected. It’s a welcome addition and brings iPadOS closer to macOS in terms of audio routing power.
Final Tips for Recording
When you’re ready to record, make sure to arm the track by tapping the R button in the track header, then hit the red record button and get going.