Creating tempo changes to your GarageBand Projects can be a good way to add a dynamic and unique feel to your songs – just ask artists like Queen, Radiohead or the Weeknd.
In this tutorial I show you how you can add tempo changes to your own projects in GarageBand for Mac!
Watch the video version of this tutorial below.
Working with the Tempo Track
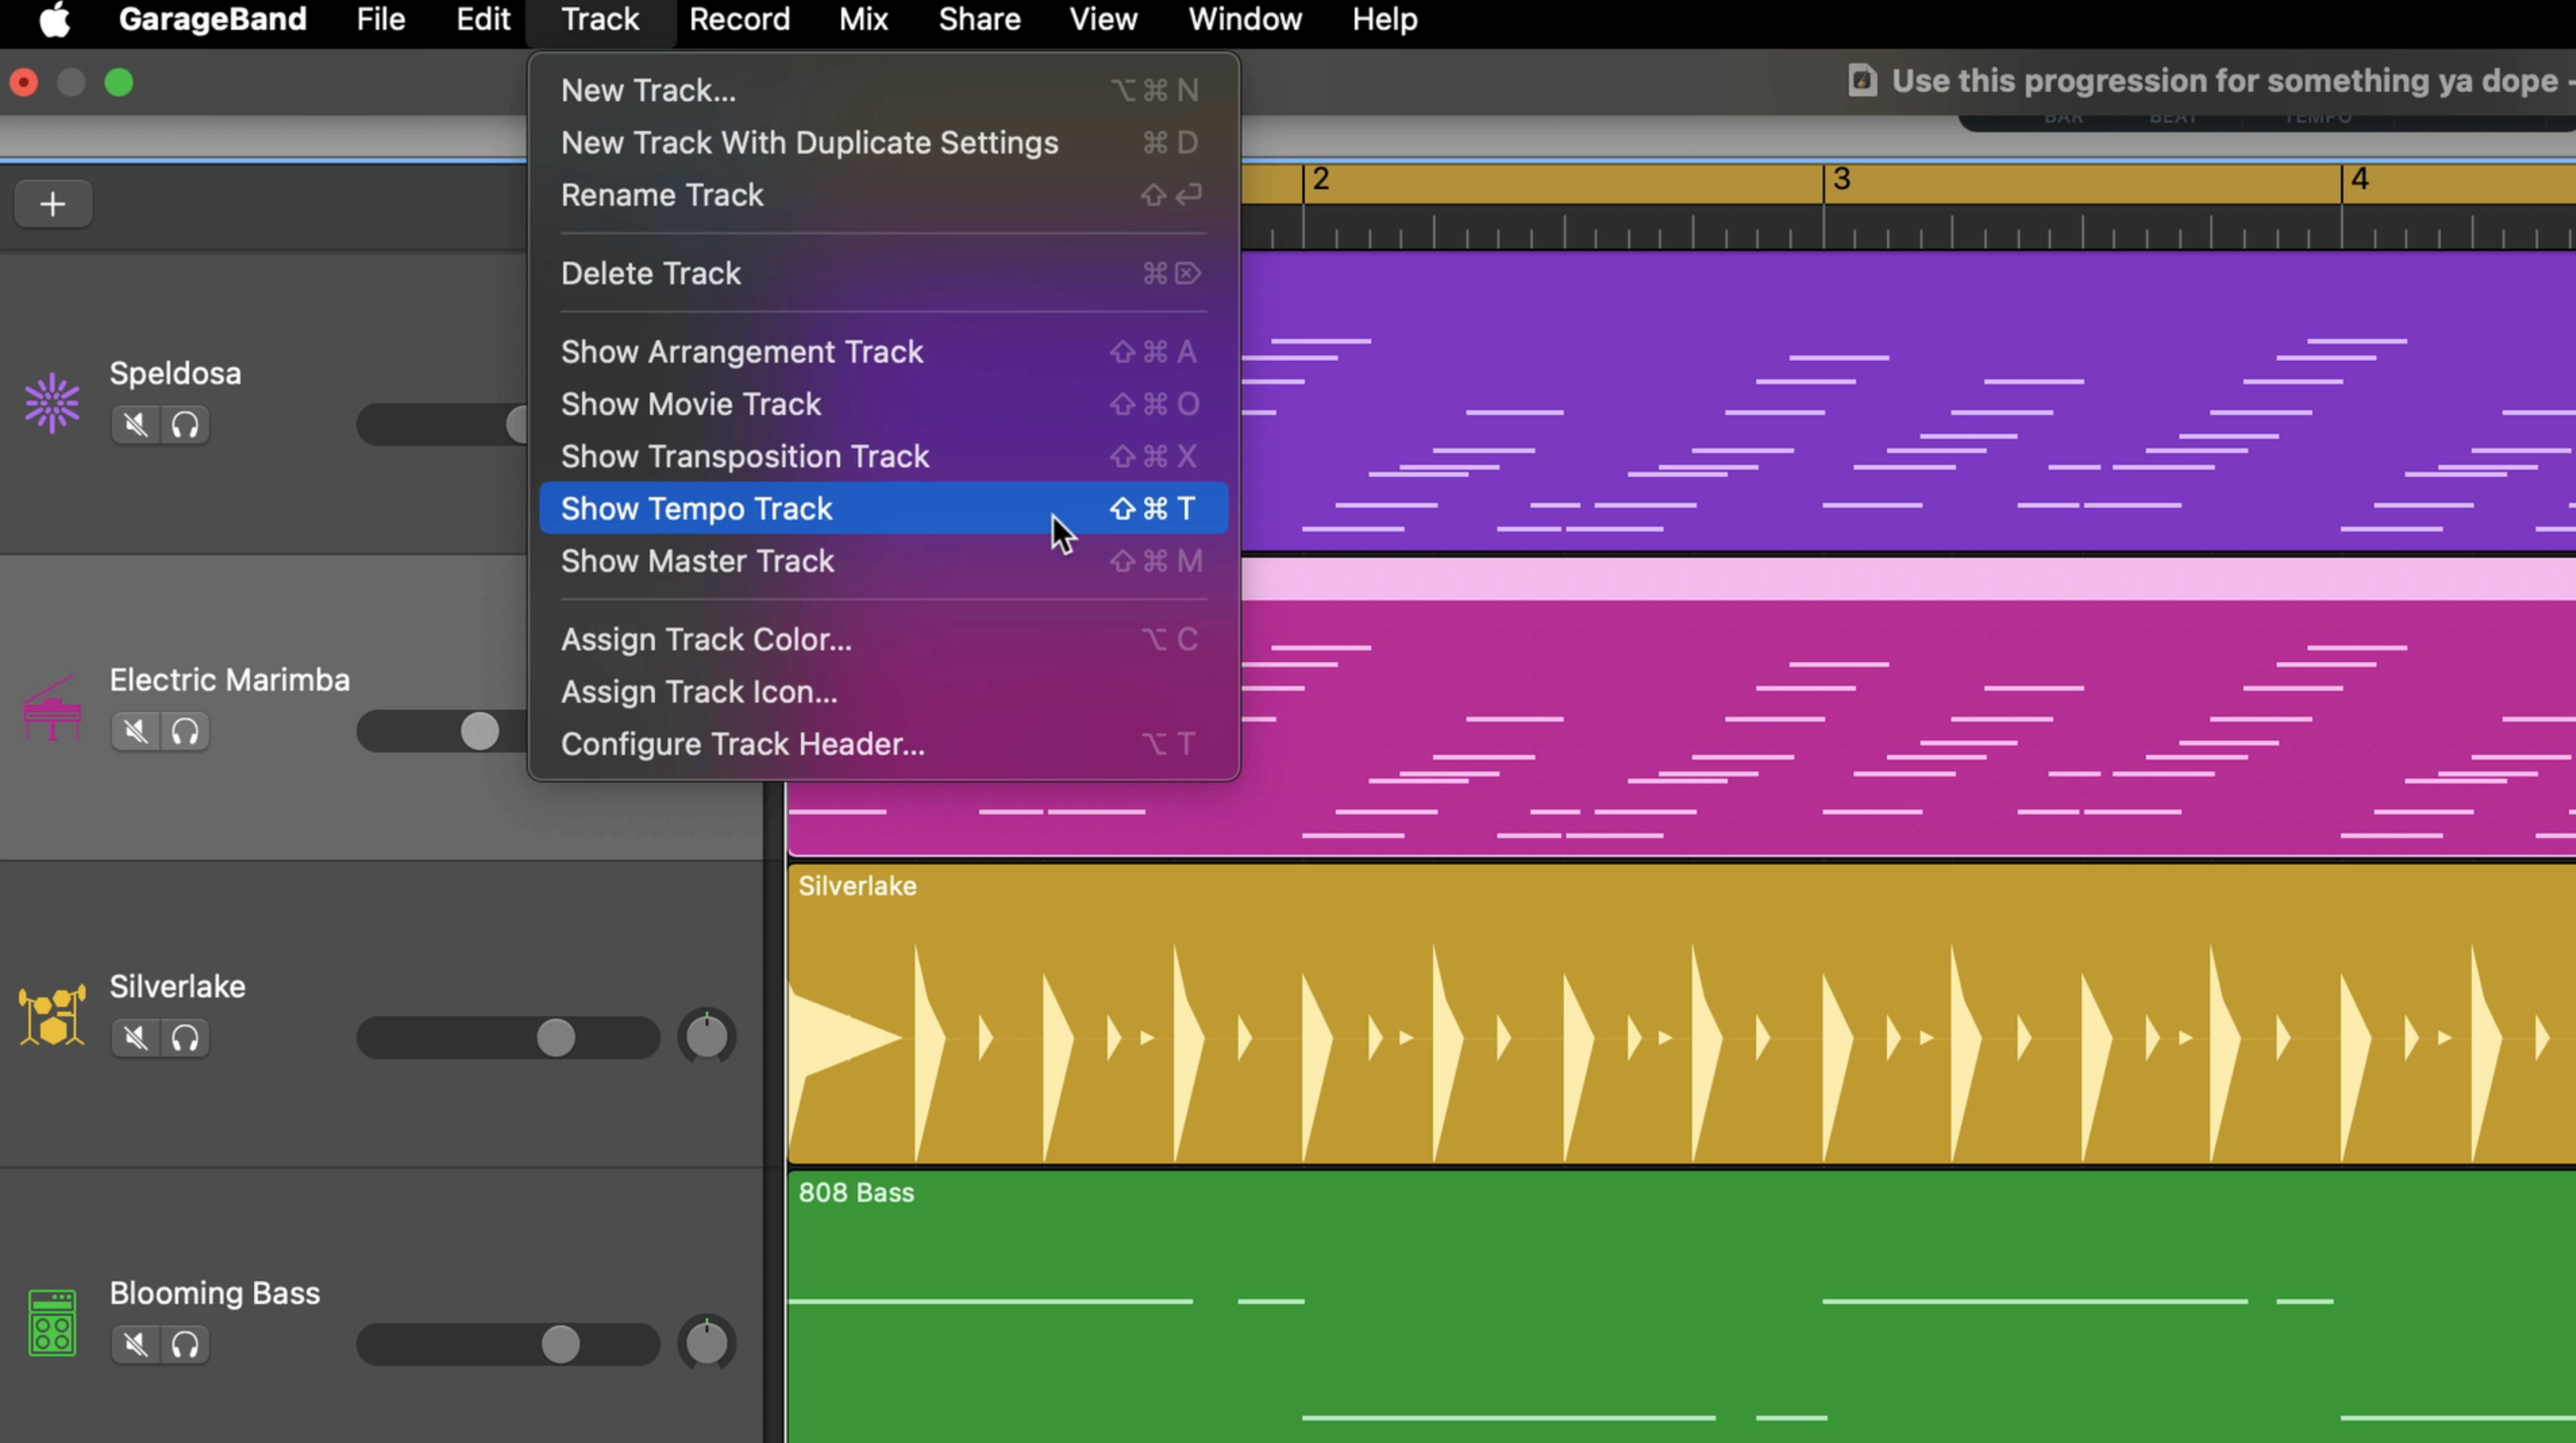
To change the tempo in GarageBand, first off click on the track menu in the toolbar at the top of your screen and then click ‘Show Tempo Track’.
You can also use the keyboard shortcut SHIFT + Command + T to open the Tempo Track.
Making tempo adjustments on the Tempo Track works in a similar way to Automation.
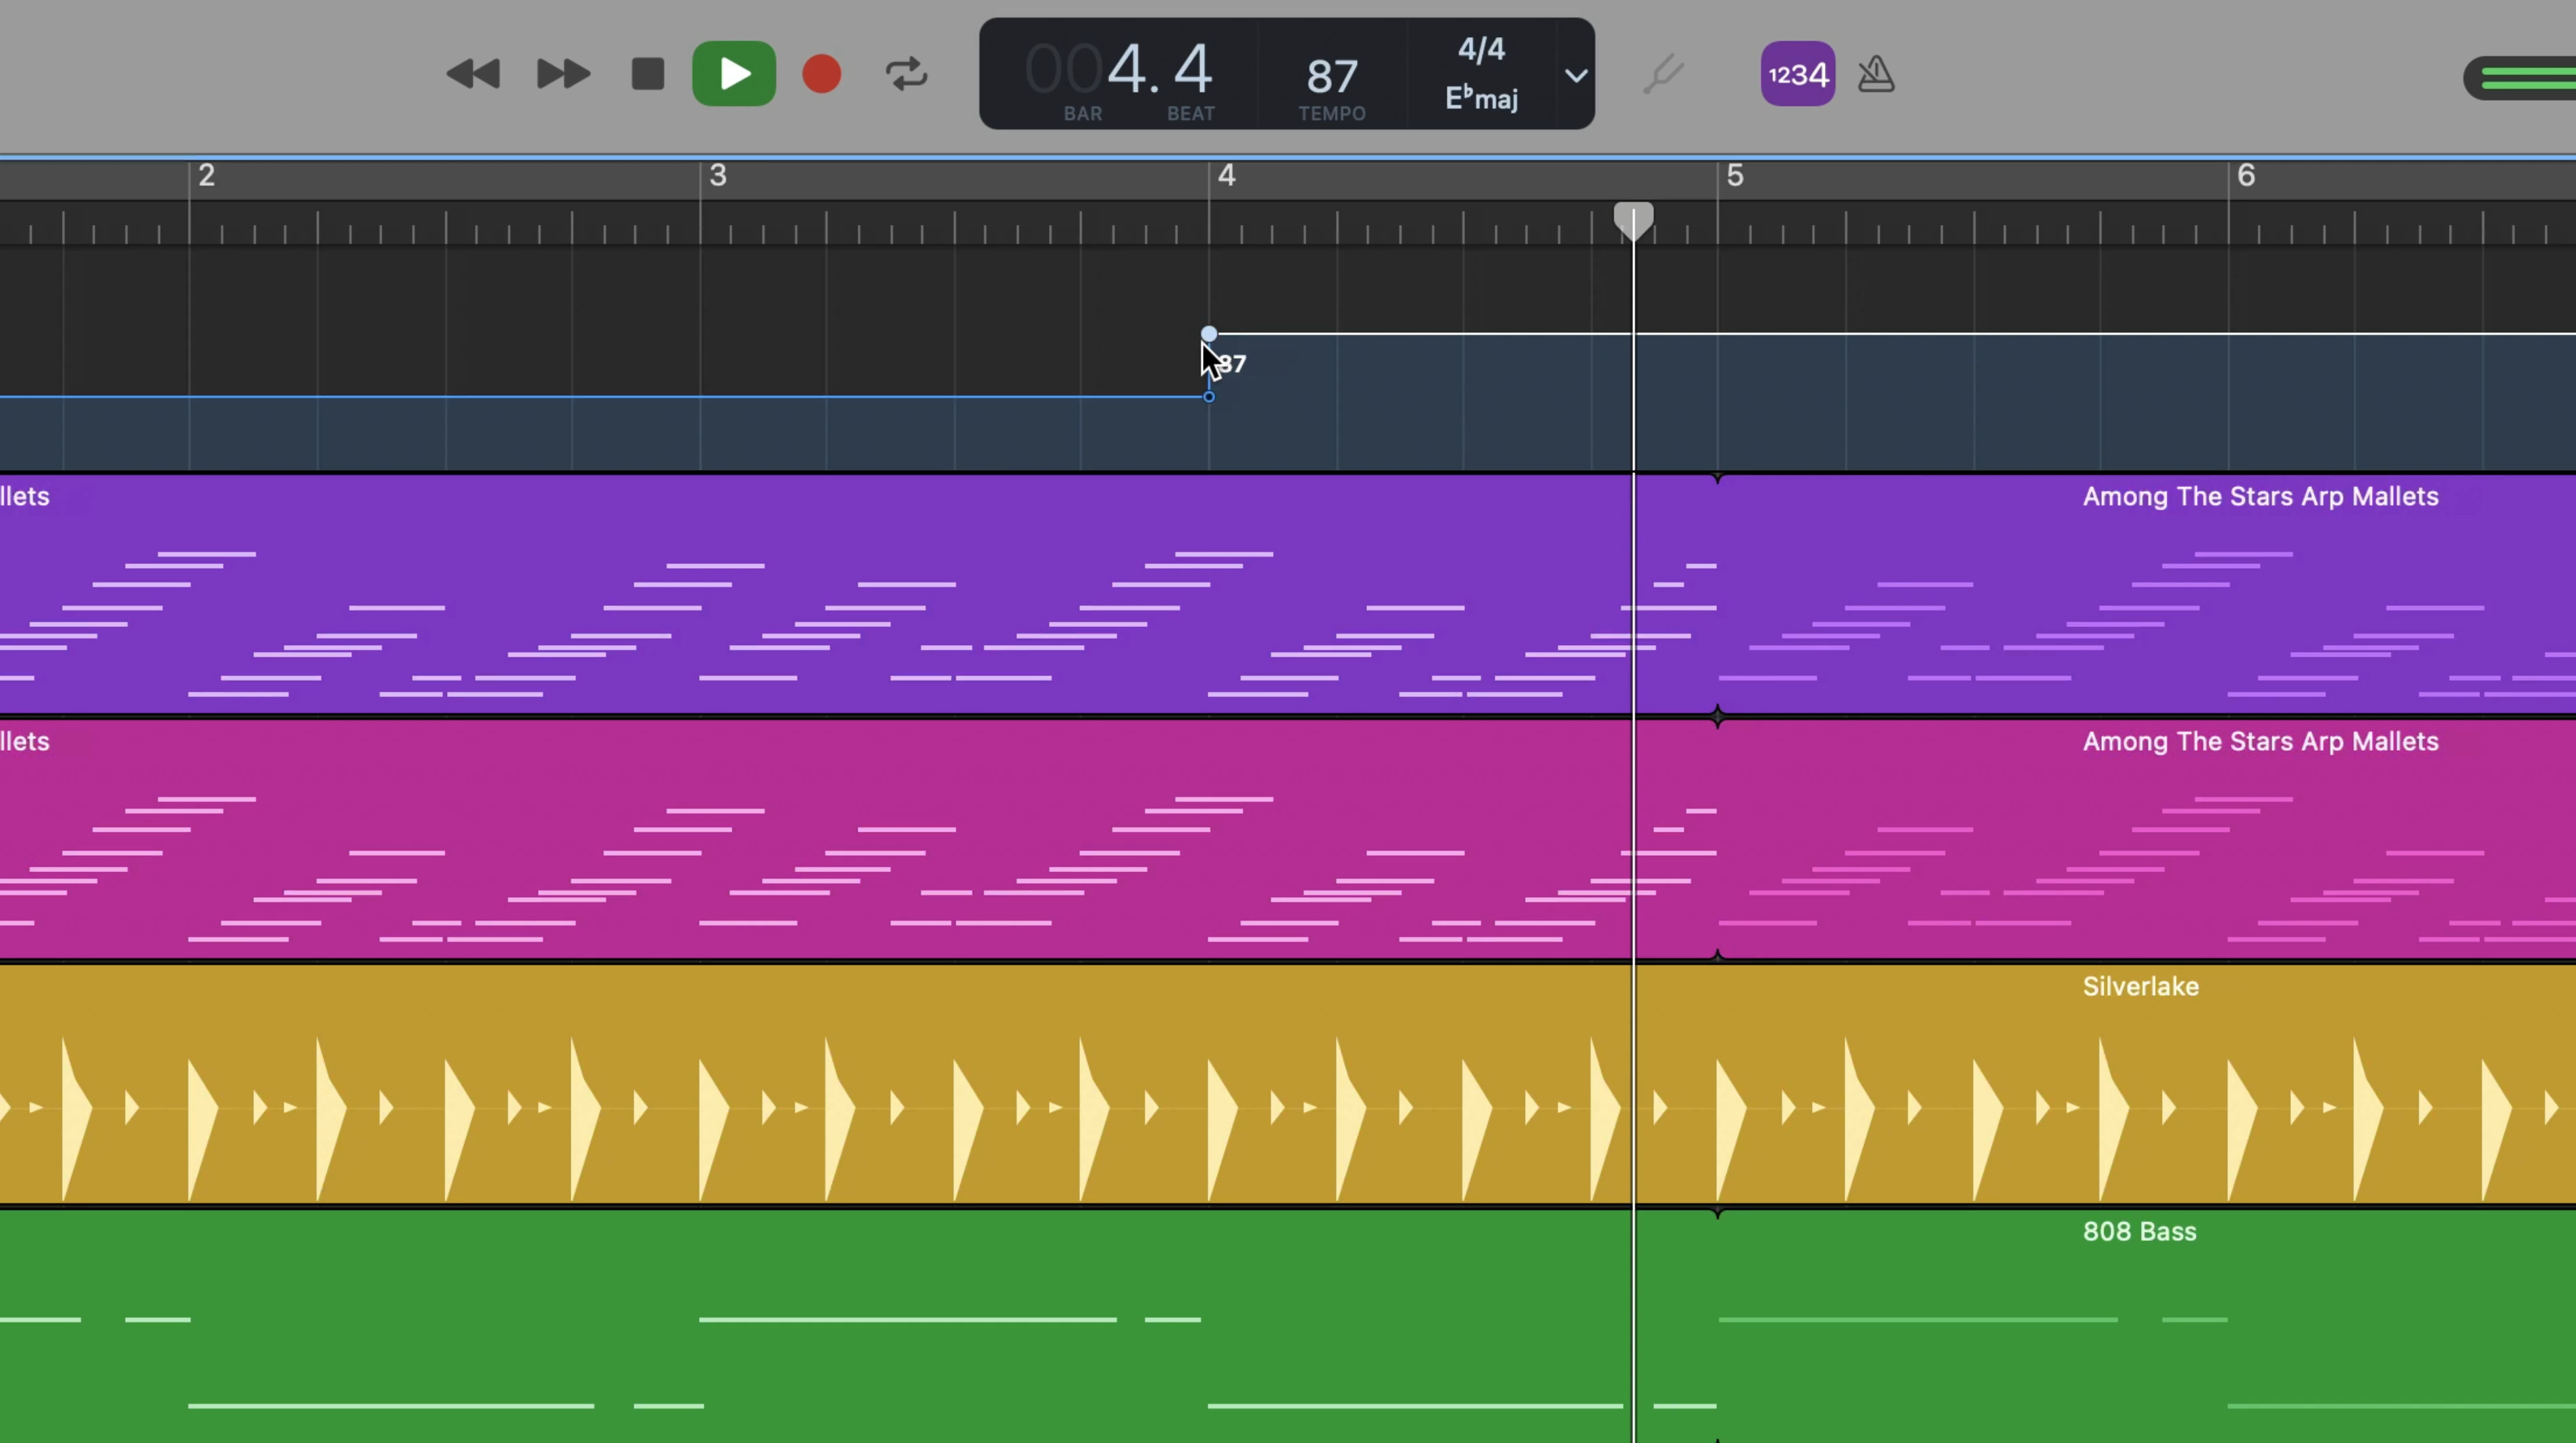
There’s a tempo line along which you can click to place adjustment points. You can click on and drag an adjustment point to change its position on the Tempo Track.
Dragging the point up and down will increase or decrease the tempo after that point.
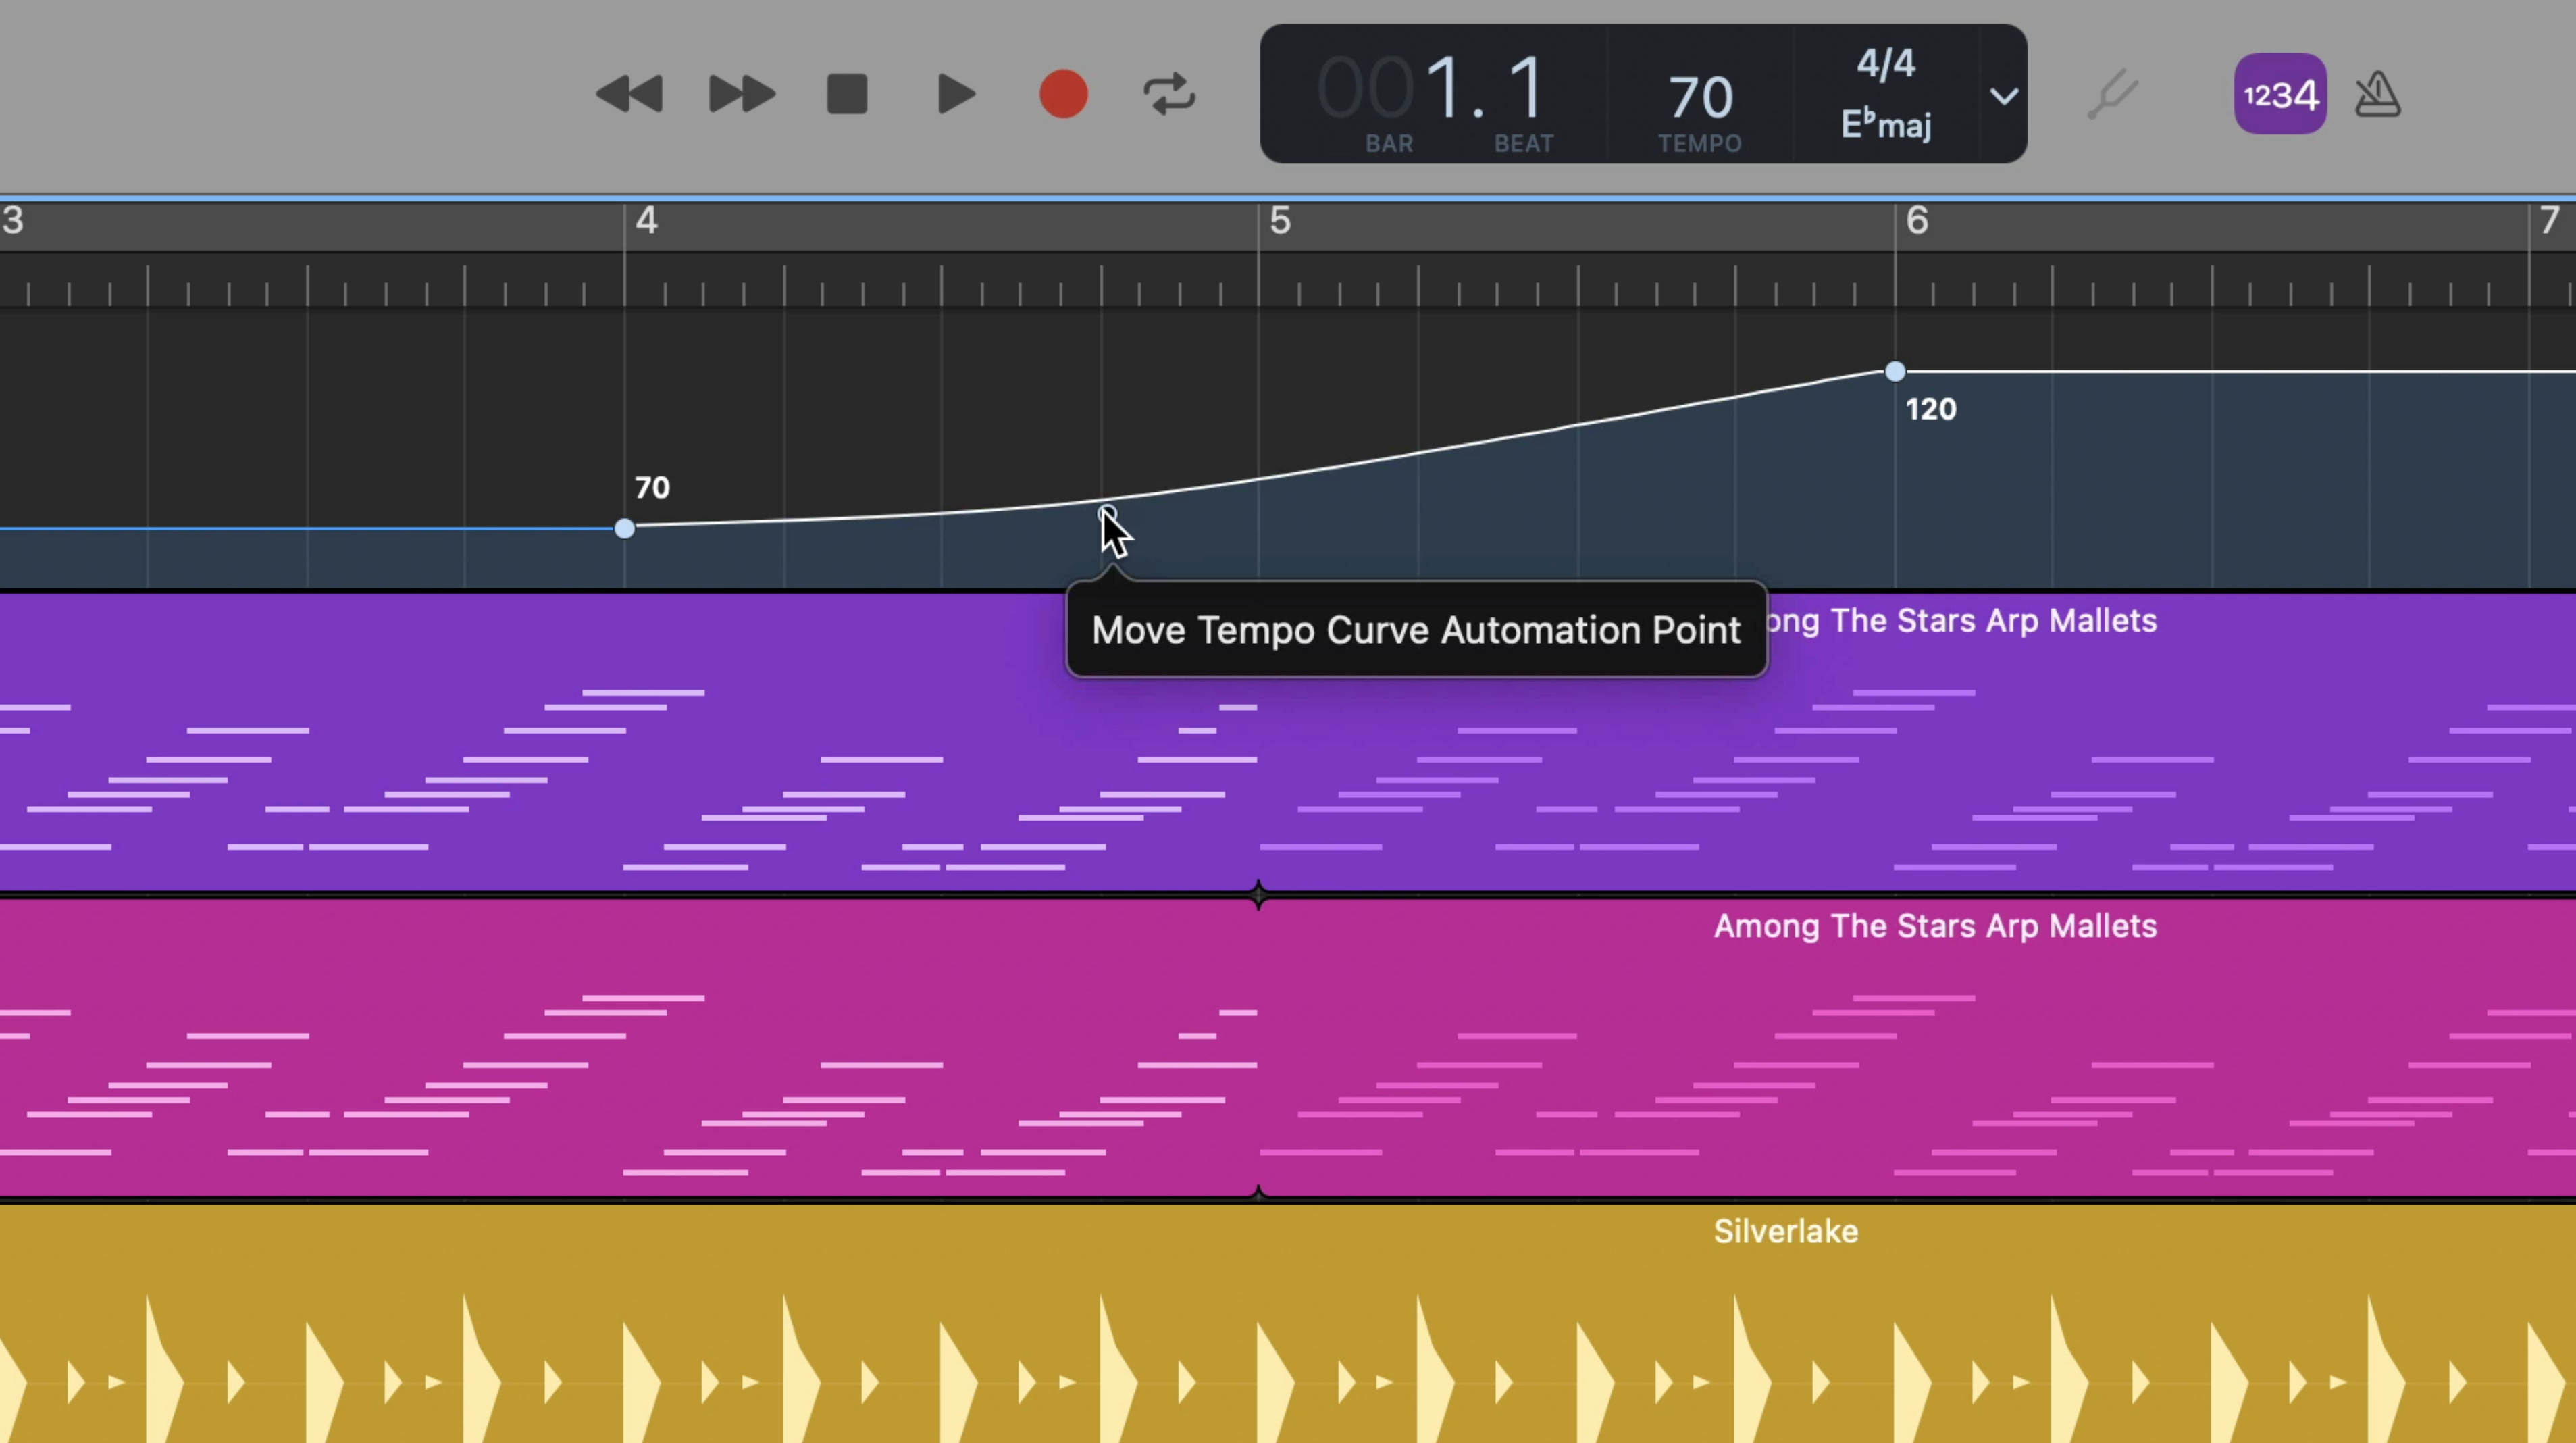
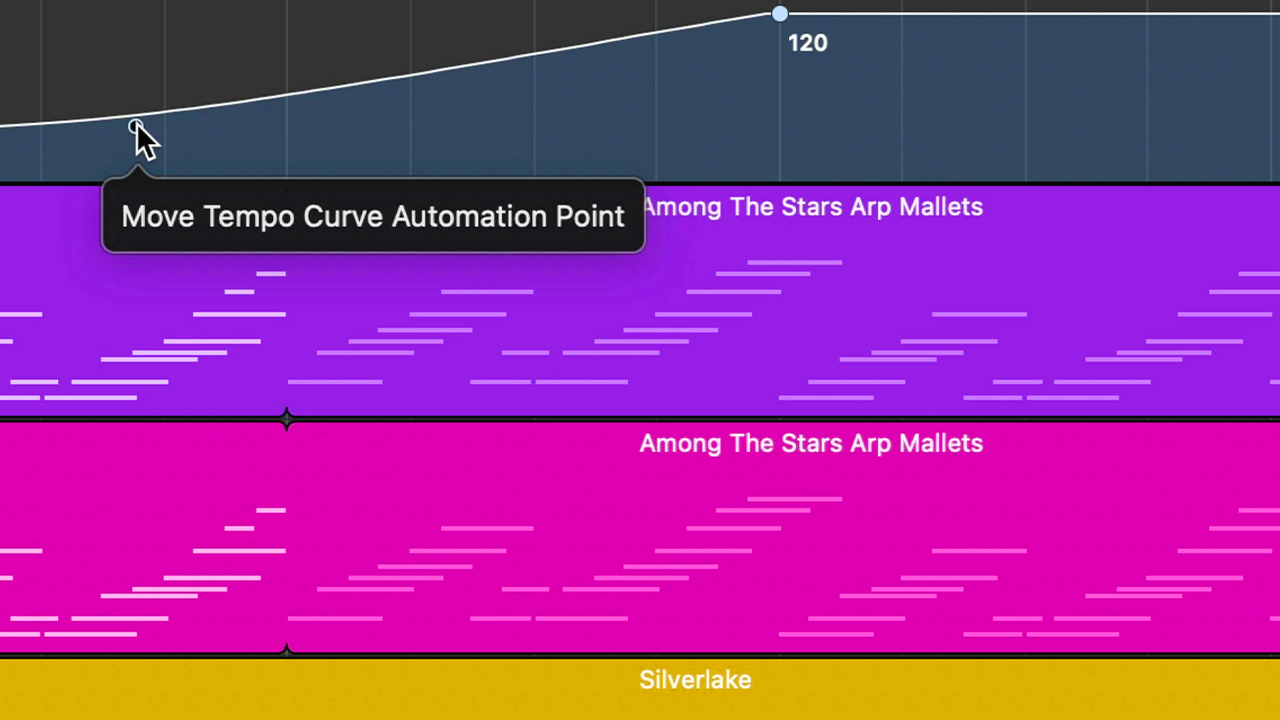
To create a gradual increase or decrease in tempo, click on and drag the smaller circle below your created adjustment point until you have a curve that suits your track.
Be aware that any pre-existing audio regions might sound a little iffy if you are changing their tempo drastically. It might be a good idea to put off any real instrument recordings until after you change the tempo in GarageBand.