How to use Compression for Beginners on iOS
It may not be the most glamorous or exciting effect in GarageBand’s effect arsenal, but rest assured learning how to use compression for beginners is one of the most useful tools available to you.
GarageBand for iOS’ built in Compressor gives you all the controls you need to shape your sound and get your tracks sitting perfectly in a mix.
In this GarageBand tutorial I’ll go over what exactly Compression is, how it works and give you some pointers on how to use it on different track types in GarageBand for iOS.
What is Compression?
In a nut-shell, applying compression to a track in Garageband lowers the volume of louder sounds to the same level as quieter sounds.
You can then raise the overall gain of your compressed track, having reduced any peaks or troughs in the volume.
How much compression you’ll want to apply depends entirely on the type of instrument or genre of music you’re working with. You wouldn’t use the same compression settings on a face melting guitar solo as you would a delicate violin melody for example.
By far the most important thing to remember – especially if you’re just getting to grips with compression – is make sure you don’t over-compress and leave your tracks or project sounding squashed or lifeless.
How Does it work?
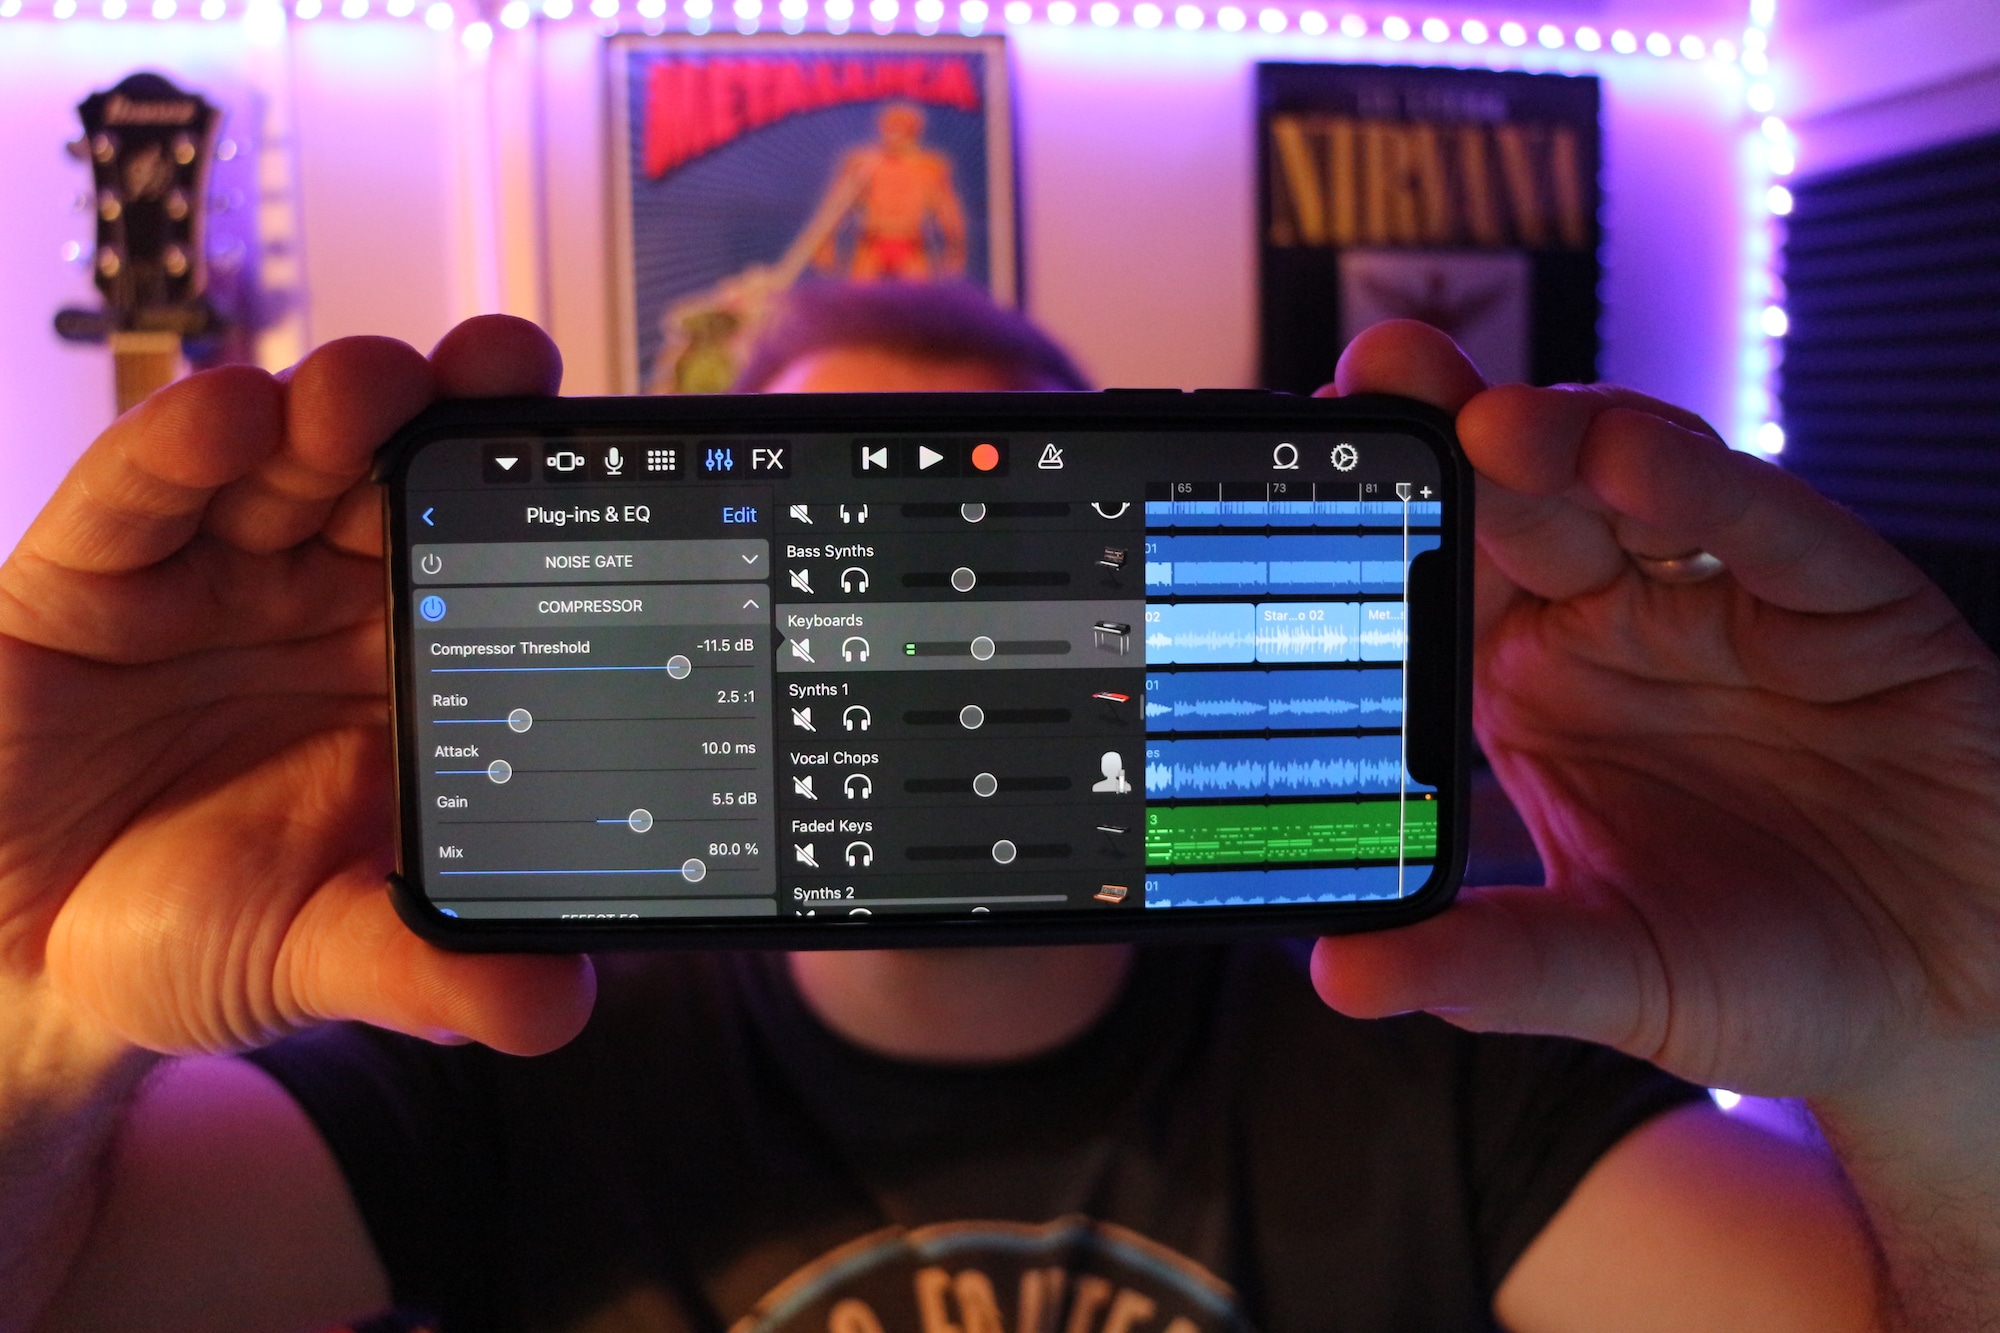
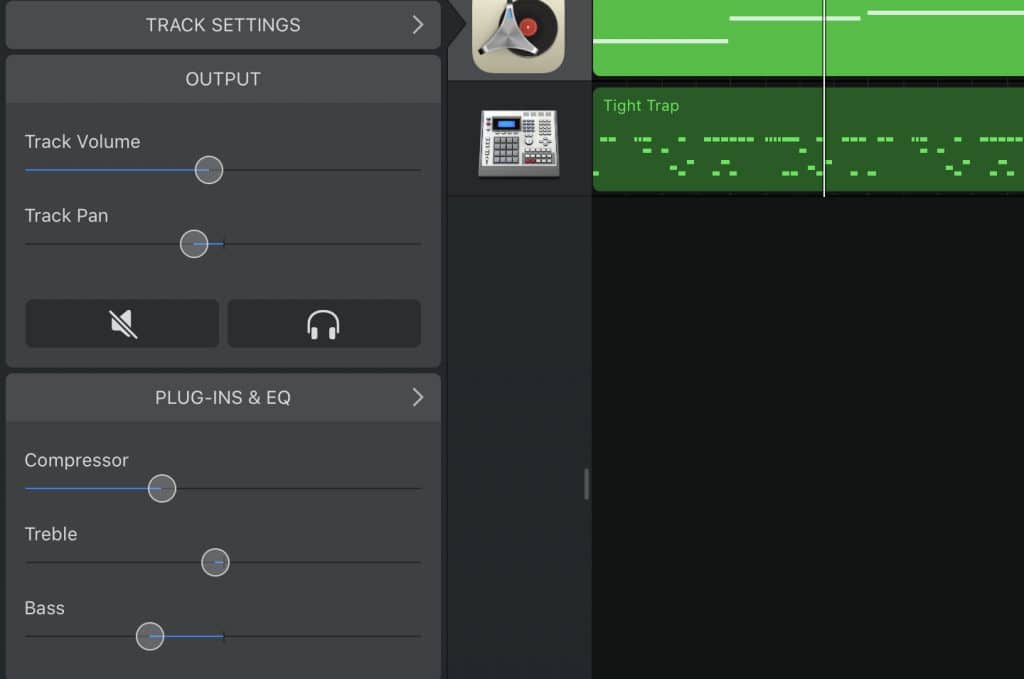
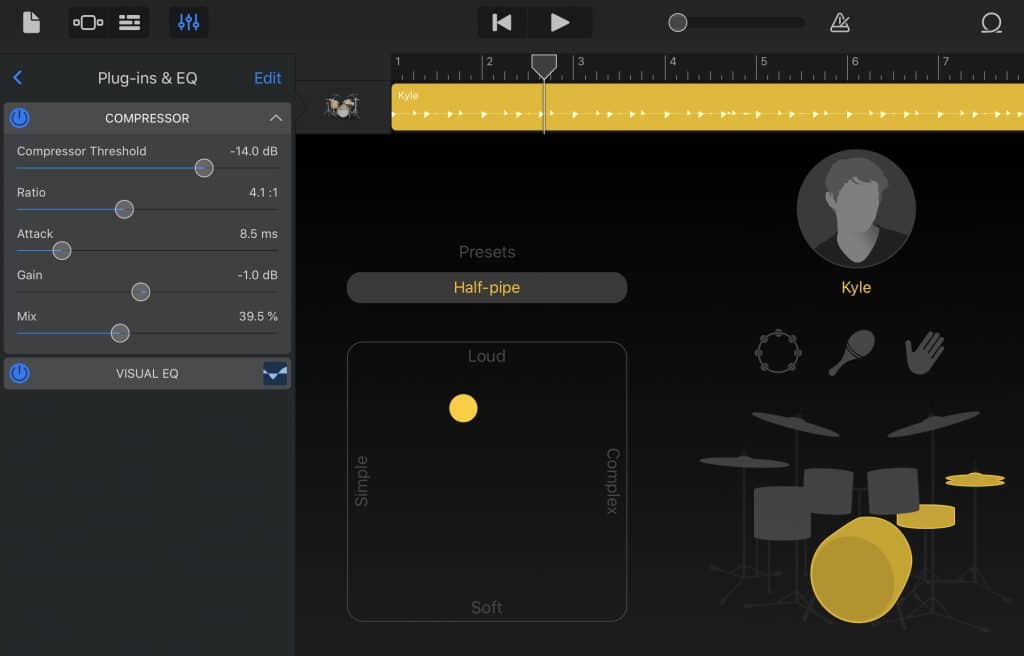
While learning how to use Compression for Beginners on iOS, You’ll find GarageBand for iOS’ stock compressor in the Plugins and EQ section of the Track Settings menu. Note that there is a single compressor slider here too, but you’re going to want much more control than that.
Tapping on ‘Compressor’ will expand the interface and give you access to 5 controls.
Compressor Threshold
The threshold controls the point at which the compression kicks in. When you click on the up/down arrows or adjust the slider a decibel (db) level is displayed. Any sound above this db level will be compressed.
Do you only want the louder sounds in your track compressed? Or do you want to really ‘level out’ your sound by setting the threshold at a lower volume?
Ratio
The ratio determines how much volume to reduce. The higher the ratio, the more volume is reduced and squished, while a lower ratio will reduce less volume.
So for example, if you select a ratio of 2:1 for every 1db that your audio goes over your threshold setting, it’s volume will be reduced by 2db.
If you select a ratio of 30:1, the volume will be reduced by 30db for every 1 db over your threshold setting (and sound majorly squashed)!
Attack
The Attack governs the speed at which compression kicks in.
How much attack you use depends entirely on what it is that you’re compressing. Snare drums, Kick drums and certain vocals (hip hop/rap) all traditionally have a fast attack setting, whereas pianos, guitars and other instruments – where preserving the dynamics and the need to sound natural are important – generally have a slower attack speed.
Gain
Remember that compression reduces loud sounds down to the same volume as the quieter sounds. Once this has happened, you need to boost the output level to make up for the lost volume. You do this by – you guessed it – increasing the gain.
Mix
The mix slider adjust how much of the compressed signal you will actually hear. setting this to 100% (which I would recommend most of the time) will only output audio with the compression effect you’ve just added. Setting it to 50% will mix the compressed audio and the original audio together equally.
How do you use it?
GarageBand for iOS will automatically apply a compression preset to most tracks that you create. If you open a Drummer track, open the track settings and then head to the plugins and EQ menu, you can see that the compressor is already set up.
While these settings are generally a good starting point to work from, I usually find that they are a bit wishy washy and require a wee bit of cranking up to sound just right.
the amount of compression required varies and depends largely on what instrument or sound you have recorded and what genre or style you are working in.
In pop music nowadays there is a lot of compression, on pretty much everything. Subtle dynamics simply aren’t as important as overall volume.
With Jazz music however, dynamics are usually preserved as much as possible to capture and convey every nuance of a performance.
When it comes to your sounds, experimentation is key, so don’t be afraid to dive into these settings, get your hands dirty and discover what works best for you and your music.
Ok, that’ll about do it for this guide on How to use Compression for Beginners on iOS – if you want to dive deeper into the world of mobile music making you can grab my Getting Started with GarageBand manual absolutely free.