As The Garageband Guide grows (there’s more blog subscribers pretty much every day now, as well as a rapidly growing community on Facebook, Twitter and YouTube) I get asked more and more questions about how to use Garageband.
Now, I LOVE answering any questions about Garageband – hell, helping you master Garageband is what this site is all about, but i’ve been wondering recently if having a series of posts that answers some of the questions I get asked the most would be a good idea….
Kind of a resource I can refer people to if and when these questions come up, you know?
All these questions were asked via the Facebook Page, Twitter or received directly by email and they’ve all been asked several times by a few different budding Garageband Ninjas….
If you’ve previously asked me one of these questions, then thank you – Not only are you incredibly good looking, your brilliant and intelligent question has directly influenced and inspired this article.
With that said, let’s dive right in…
How Do I Record My Voice In Garageband With The Built In Mic?
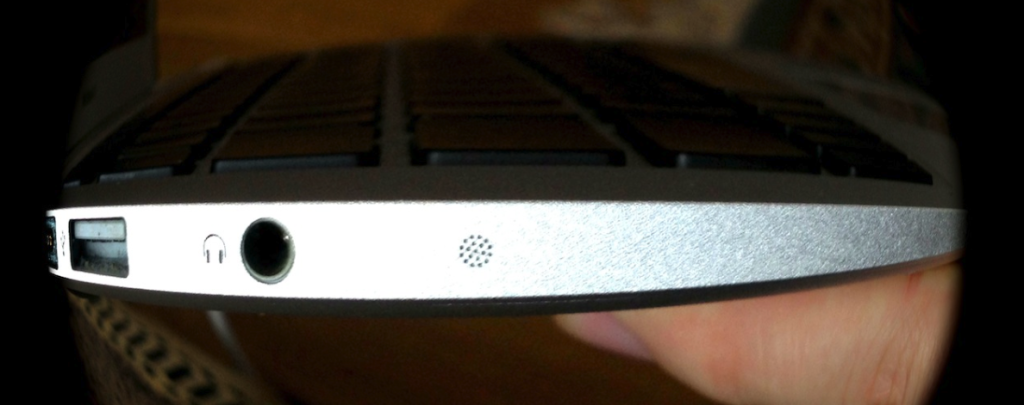
First things first – you need to locate where the in built mic is on your particular Mac – it’s position varies depending on what type/model you have.
Here’s where the in built mic is located on my Macbook Air 13” (A1369)
Once you’ve found it, open a new Garageband Project and hit option + ⌘ + N to open the new track box and select “Real Instrument”.
Once your new Real Instrument track has been created, head over to the track info pane on the right hand side of the project window. Look for the click-able drop down menu marked “Monitor”. Click it and select “ON”.
You’ll now be able to hear what your built in mic is picking up.
From there, just hit record and speak into the mic!
How Can I Stop Garageband Stuttering/Freezing/Generally Being Slow?
I recently covered the best ways to optimize Garageband right here on The Garageband Guide.
Check it out here
How Can I Make Recorded Sounds Louder Without Causing Clipping?
I get asked this one a lot. The answer is to manually adjust the signal strength of your input.
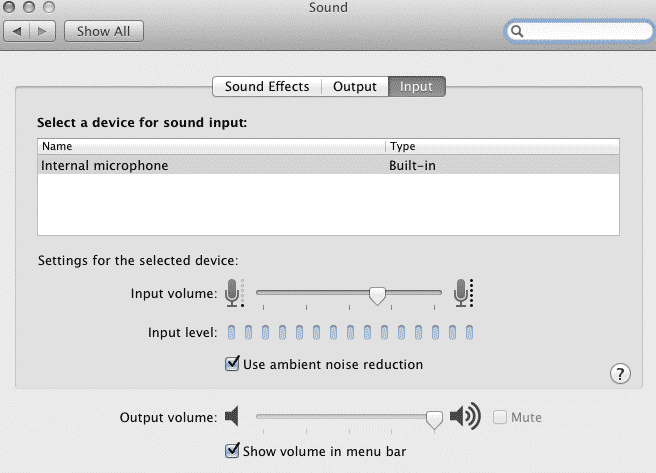
To do this, you’ll need to jump into your Mac’s system settings….
Go:
System Preferences > Sound > Input Tab
You’ll see a list with the available audio inputs attached to your Mac (usually the built in mic plus whatever else you have plugged in).
Select your mic and move the ‘Input Volume‘ slider to a louder level (careful not to overdo it – anymore than 60% – 70% is probably too much).
This will increase the input signal volume and make your recordings via your mic altogether louder, matching more closely with the volume of the rest of your tracks.
This should mean that you’re not having to manually ‘turn up’ your vocals as much.
Can I Edit Movies In Garageband?
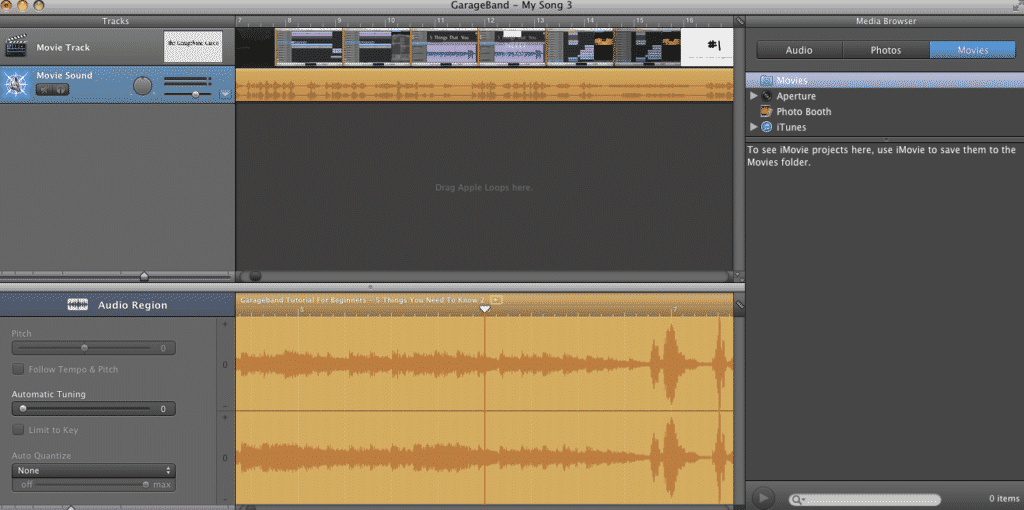
This is completely do-able, though you’ll find Garageband a bit light on video editing tools. (You’d be better off with something like iMovie to edit the actual video)
It is great if you want to add a soundtrack or effects to your movies though.
You can just drag a movie file from your desktop straight into your Garageband project window, or you can manually import it by using the Media Browser tab.
It’s the button that looks like film/music notes in the bottom right hand corner of the Garageband project window (next to the Loop Browser button and the Track Info button)
Either way, the movie file and the audio track for that movie will import on different tracks, allowing you to remove or edit the movie’s audio as you see fit. You can just add new tracks for your sound effects or background music as needed.
That’s all for this how to use Garageband frequently asked questions round up. Was it helpful? Should I do more as I receive more questions?
Leave a comment below and let me know.
Got a question you need answered? Get in touch via Facebook, Twitter or email me directly – patrick@thegaragebandguide.com


