Like most musicians, inspiration usually strikes me at the most awkward moments.
I’ve lost count of the number of dead cert hit singles (honest…) and killer vocal lines i’ve cooked up while lying in bed, at work or when visiting the family…. and forgotten before I could get them even roughly recorded.
I’m sure you’ve been there too, right?
Luckily all that changed when the Garageband app for IOS came along…
I love the flexibility of Garageband on the iPhone/iPad. Having a mini recording studio in my pocket means that wherever I am and whatever I’m doing – when that flash of inspiration strikes, i’m able to capture and record those fickle melodies, fleeting tunes and sneaky beats whenever they pop into my head.
There often comes a point however, when I go as far as i can with the Garageband App and want to take my project a bit further – give it the full on Garageband ’11 treatment, you know?
Luckily, it’s easy enough to transfer your Garageband projects from your iPhone or iPad to your Mac.
How To Transfer Your Garageband IOS Projects To Mac OS X
Step 1
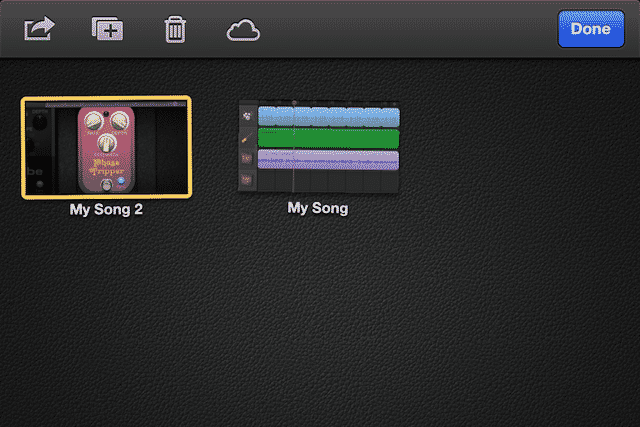
In your Garageband IOS project window, hit the arrow in the top right corner and select ‘My Songs’ from the drop down menu.
Hold down on the song you want to transfer to your Mac for a second – you’ll know you’ve done it right when your song icons start to shake – don’t worry, they’re not scared. They’re just really excited about what’s to come……
Step 2
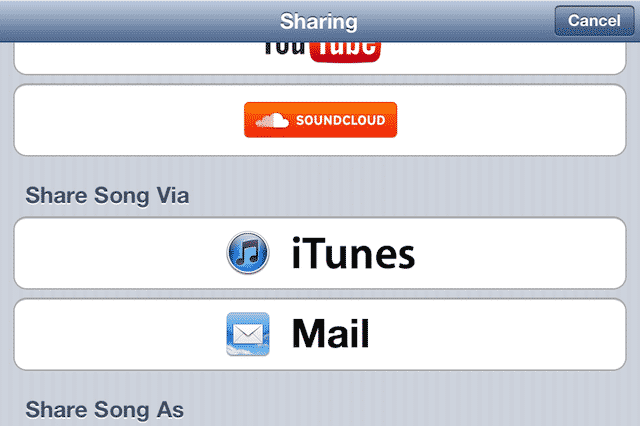
Hit the share icon in the top left hand corner of the screen to bring up this menu. From here, select ‘Share song via iTunes’.
Step 3
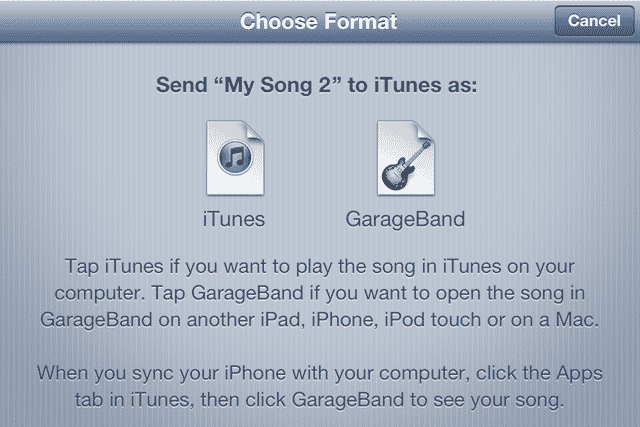
You’ll then be greeted by this screen. Choose to send your song to iTunes as a Garageband file.
Step 4
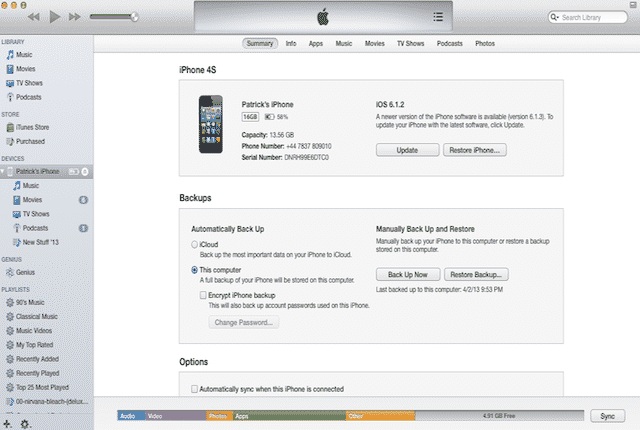
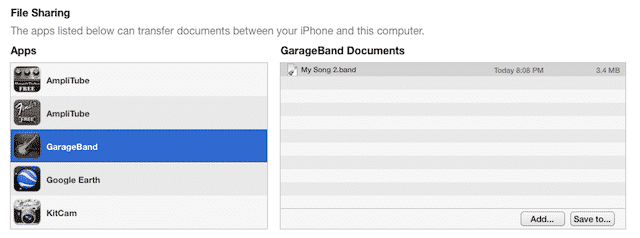
Now, connect your iPhone/iPad to the Mac you intend to transfer it to, then open iTunes and select your device from the sidebar. From here, click ‘Apps’ from the device’s menu bar.
Step 5
Scroll down to your selection of file sharing apps and select Garageband from the list. The project you sent to iTunes will be visible in the list to the right – select it, choose ‘Save To…’ and plonk it wherever you see fit.
Step 6
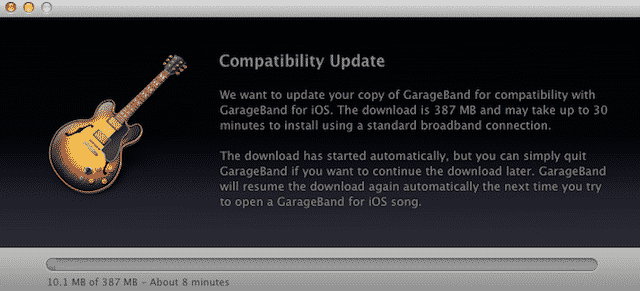
From here, it’s simply a case of opening your transferred project the same way you would any normal Garageband project, though if you haven’t already, you’ll have to download an IOS compatability update before you’re able to dive in.
Success!
There you have it – transfer your Garageband IOS Projects over to Garageband ’11 in 6 easy steps.
This article was inspired by the lovely Rosa Naccarato’s query on The Garageband Guide Facebook Page, where she was wondering how to transfer a Garageband project from her iPad to her son’s Mac.
Got a Garageband question that needs answering? Come and post in on Facebook – I answer every single one as best I can!

